@dutchdavemodelbench
118
Following
106
Followers
25
Updates
559
Likes
79
Comments
6
Votes


67 days ago
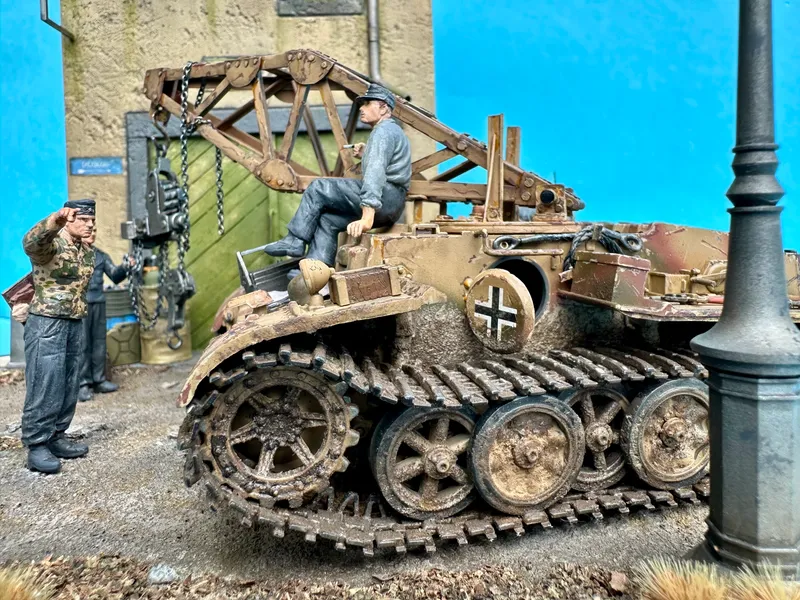
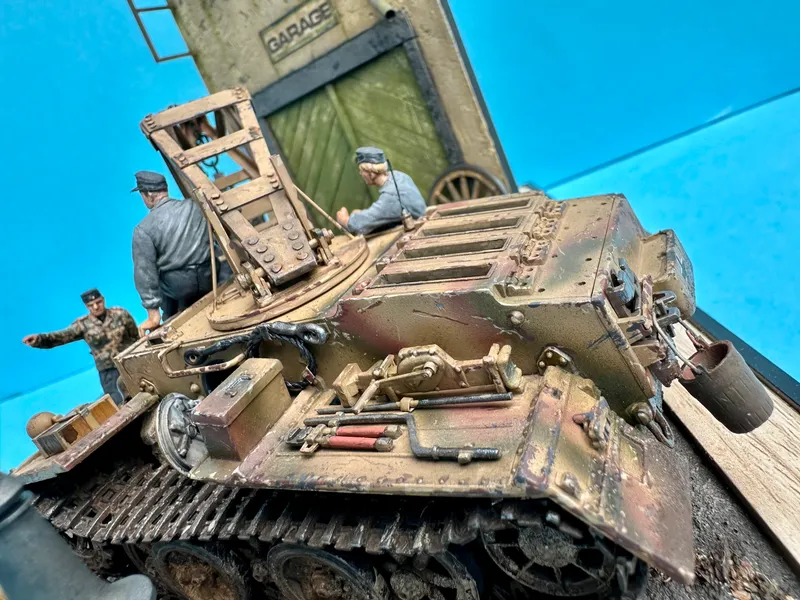
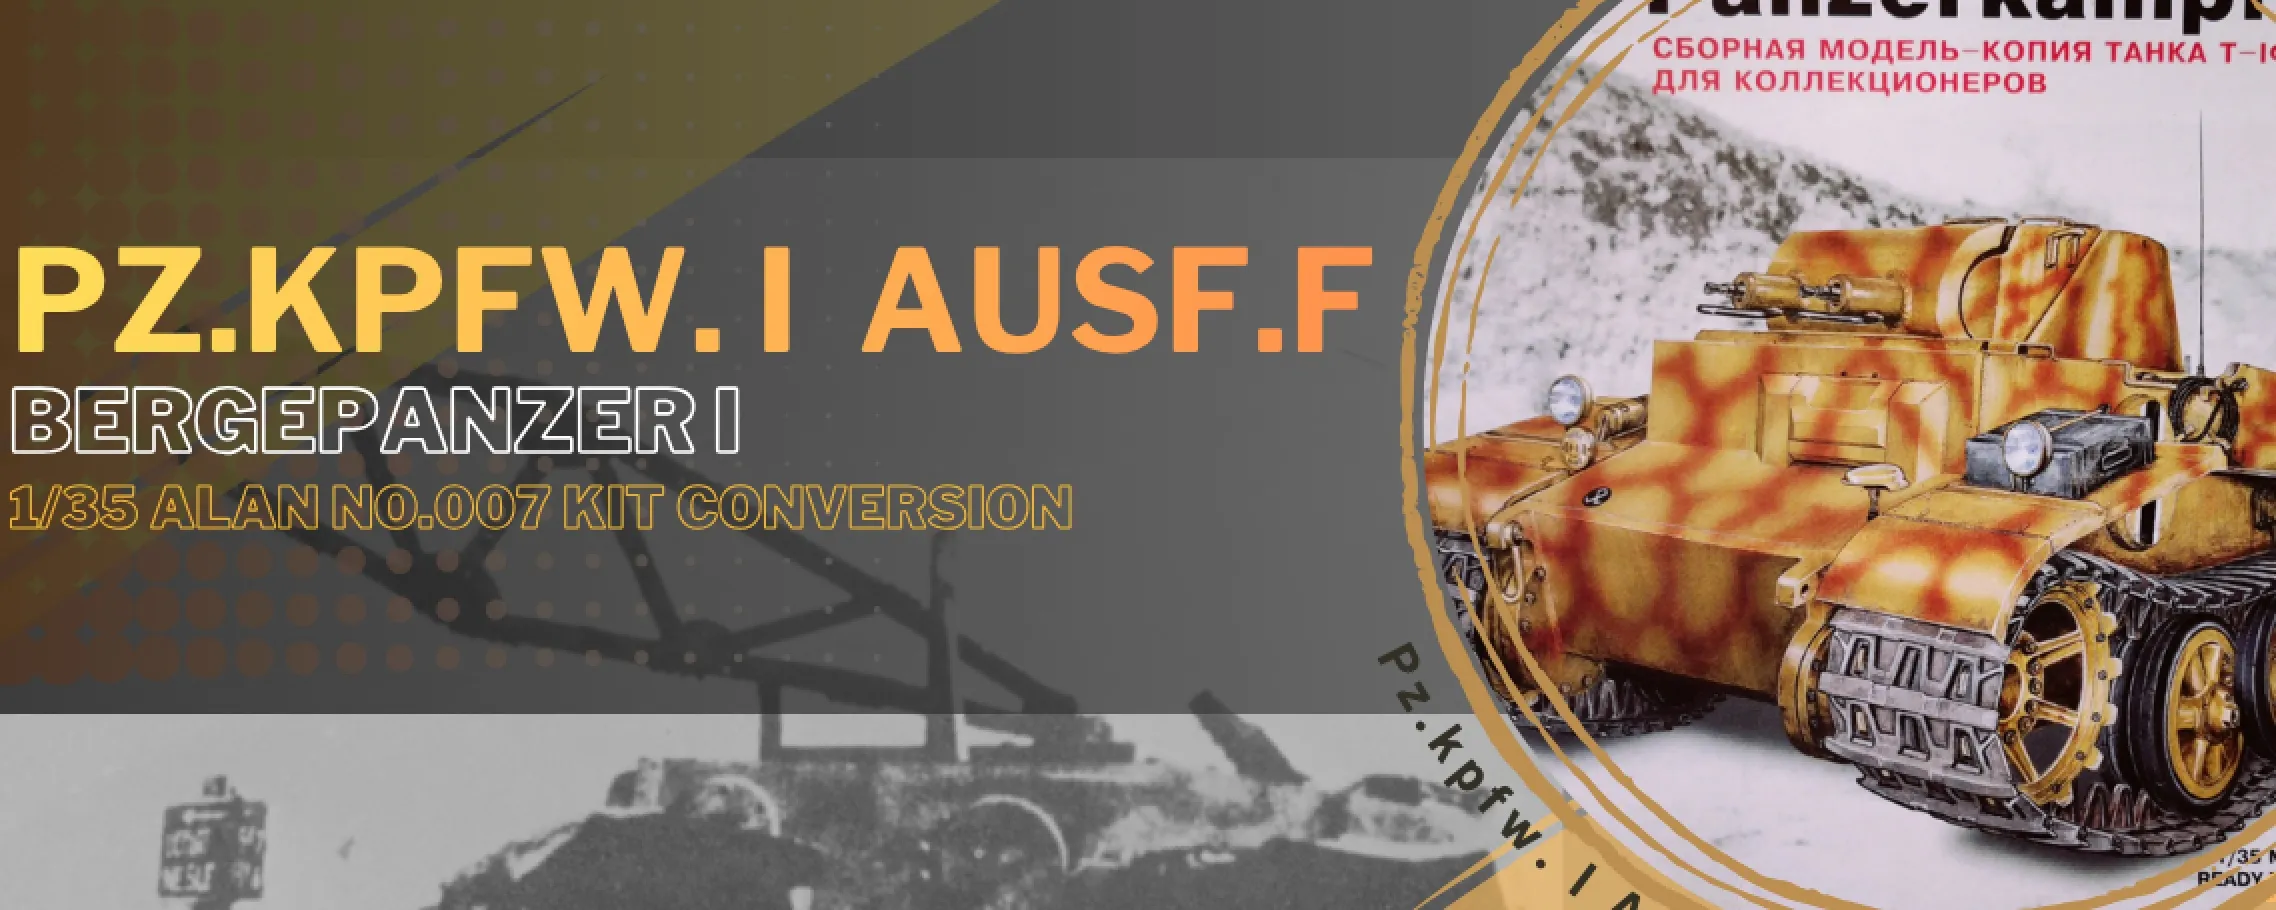
I entered Gaahleri's GWCC with a project that had been rattling around in my head for a while: taking the humble 1/35 Panzer I Ausf. F and turning it into a rare Bergepanzer I — an early-war panzer converted to a recovery vehicle.
The Base
The build started from Alan's 1/35 kit of the Panzer I Ausf. F. The Ausf. F is already an oddball in the Panzer I family — thicker armor, no turret-mounted main gun in some variants, more of a heavy scout than a proper tank — which made it a fitting donor vehicle. Historically, chassis like this got repurposed for all sorts of support roles once they were judged obsolete for frontline combat, and a recovery vehicle conversion felt like a great opportunity to show how the Wehrmacht actually improvised.
Scratch-Building the Crane and Hoist
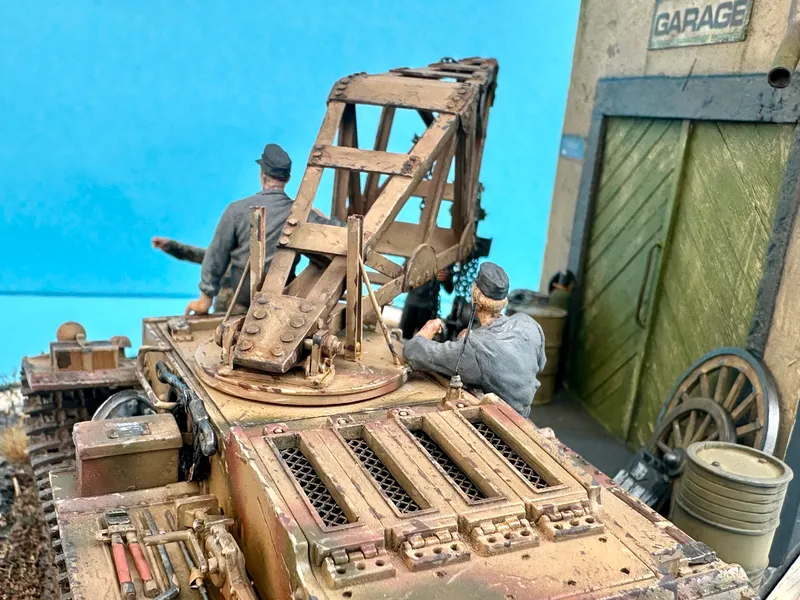
The centerpiece of the conversion — and the part I spent the most time on — was the crane and hoist assembly mounted where the turret would normally sit.
I built the crane arm and support framework out of styrene angle stock, which gave me the rigid, slightly industrial look a working boom needs without it feeling flimsy or toy-like.
The angle profile also made it much easier to fake the riveted, bolted-together construction that real field-improvised recovery gear tends to have.
For the smaller mechanical details — pulley housings, mounting brackets, and the bits that make a crane look like it actually does something rather than just standing there — I raided the spares box. A recovery vehicle is a great excuse to use up all those oddly-shaped leftover parts that never seem to fit anywhere else; a lot of what looks like "real" hardware on this build is actually a mash-up of parts never meant to go together.
The hoist cable was scale chain, which reads far better than thread or wire at this scale once it's weathered — you get actual link definition and a sense of load-bearing weight hanging off the boom.
Getting the crane to actually look functional — rather than just present — took a few passes. I paid particular attention to how the boom's angle, the position of the hoist, and the slack (or tautness) of the chain would read together, since that's what sells the illusion of a machine rather than a static model with a stick glued to it.
The Reference Problem
The real challenge on this build wasn't just the building — it was the not-knowing. Actual reference for the Bergepanzer I is thin on the ground: I had just three historic photos and a handful of blueprints to work from, and none of the 3 photos gave me a full, unambiguous picture of the crane's proportions.
That left scaling as the trickiest part of the whole project. With so little to cross-reference, I had to make constant judgment calls — using the hull and known Panzer I dimensions as an anchor, comparing what little was visible across the three photos, and extrapolating the rest from how a boom and hoist of that era would need to be proportioned to actually lift something. It's the kind of problem where you can't just measure and scale up; you have to build a hypothesis and stress-test it against every scrap of evidence you've got, then commit once it feels structurally and visually right.
Wrapping Up
The finished piece sits somewhere between "what the Wehrmacht might plausibly have cobbled together" and "what makes for a good story on the display shelf" — which is exactly the sweet spot I was aiming for with a scratch-built conversion like this. It was a satisfying one to finish, and a good reminder that some of the most rewarding builds start with a bit of a historic mystery.
Thanks everyone that took part in my journey!
Youtube: https://youtu.be/fBN6fNozW0Q

68 days ago
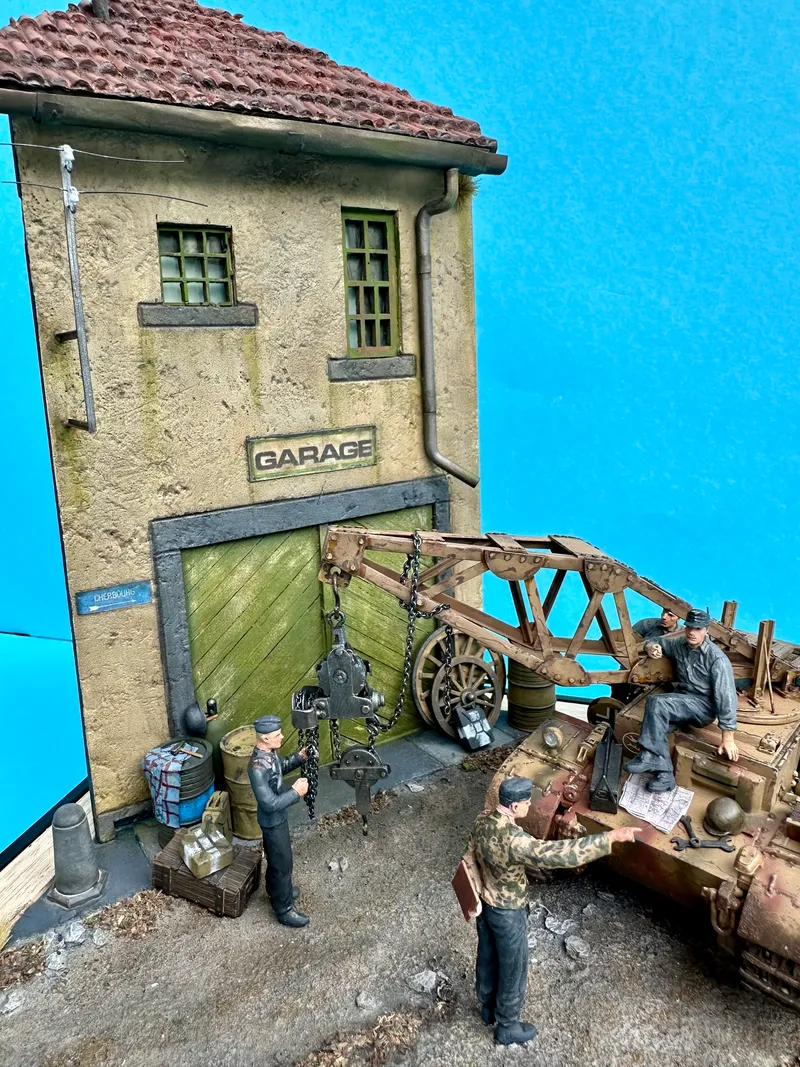
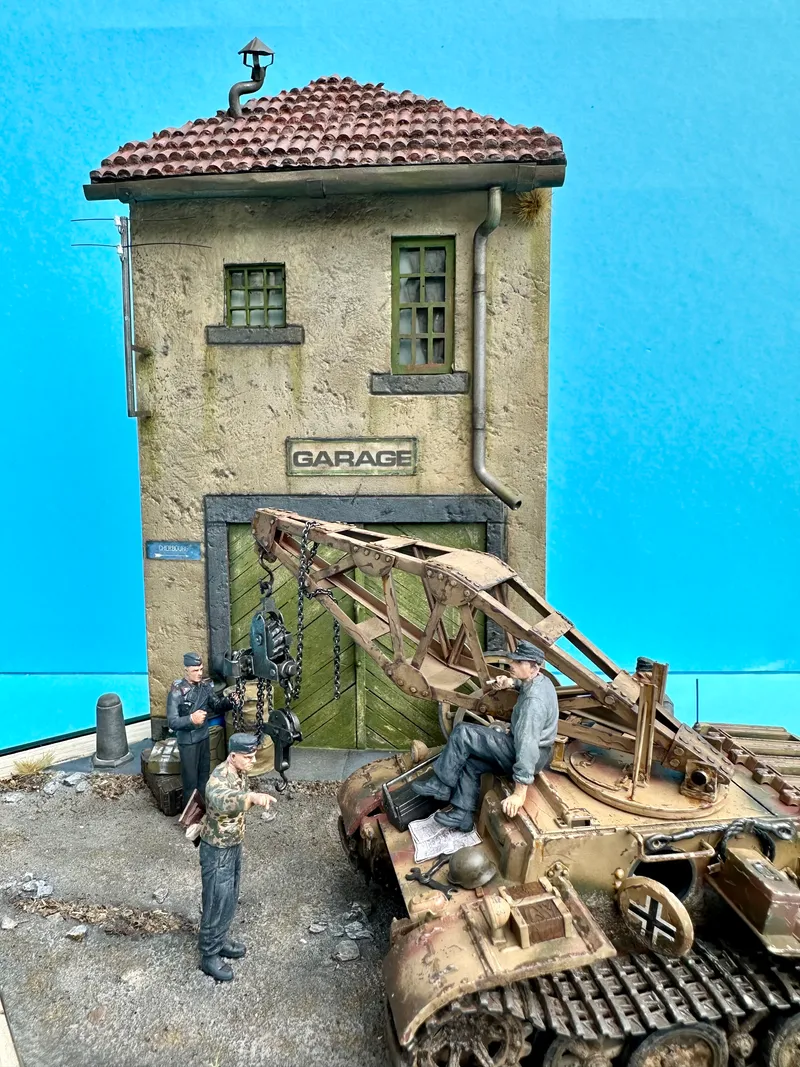
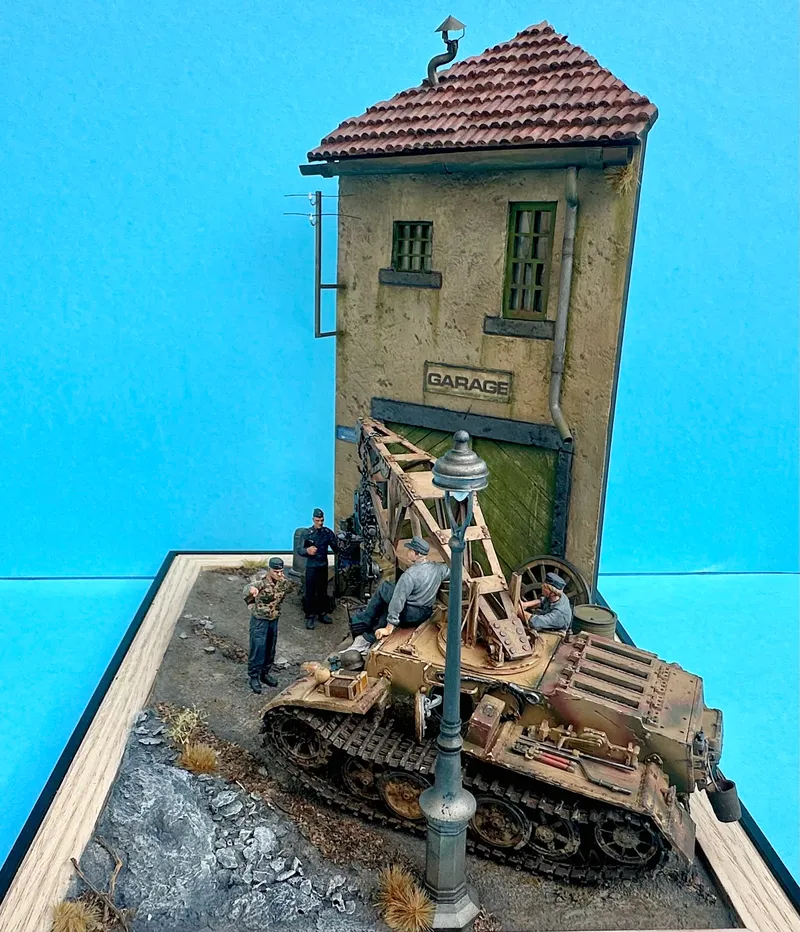
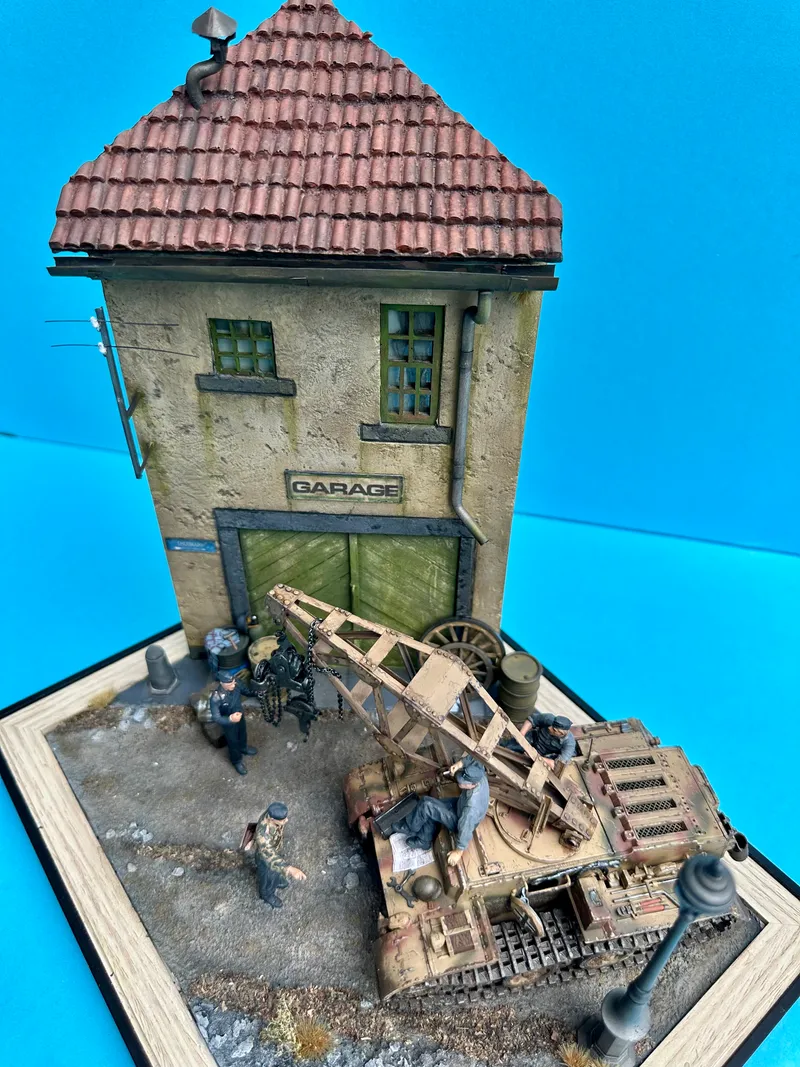
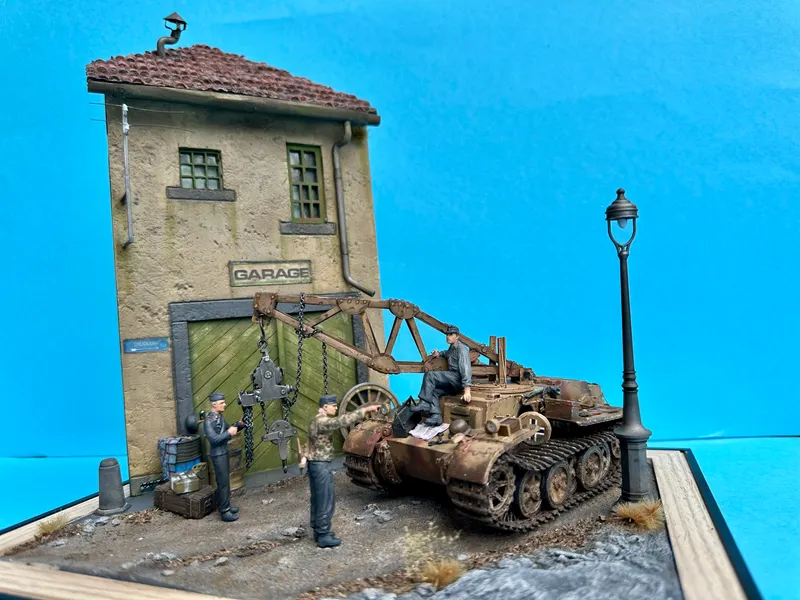
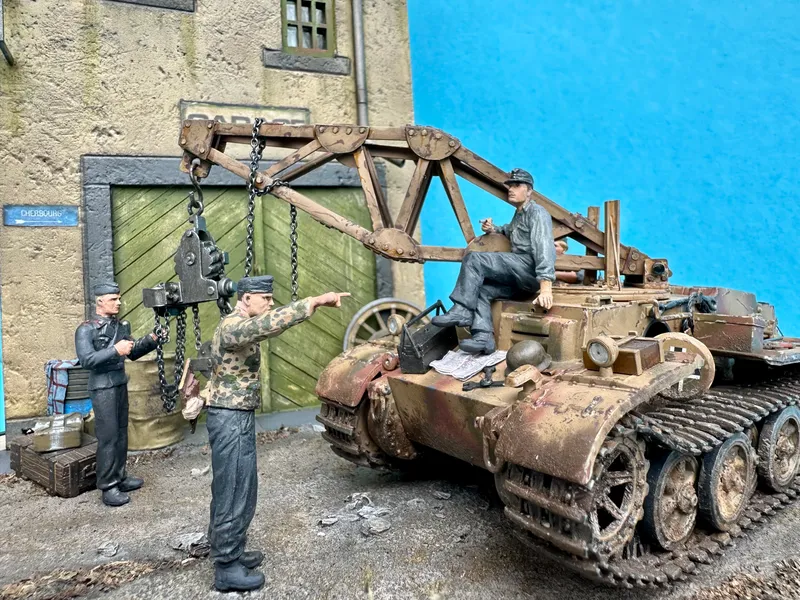
The journey is complete, and the final submission is officially ready to be uploaded for the judging. Blog #23 marks the ultimate chapter for this project, where the scratch-built Bergepanzer I crane conversion and its dedicated French village diorama finally come together to merge into a single, cohesive story.
What started as a typical Eastern Europe 90ies Alan Panzer I Ausf. F. kit, some blue prints and sheets of white styrene has transformed into a rich historical snapshot.
Setting the Scene: Somewhere in the West of France
The entire diorama captures a quiet, tense moment of respite somewhere in the west of France. The contrast between the elements tells the story: the intact, standing roadside house with its heavily scrubbed, faded green garage door serves as the perfect backdrop for the rugged, camouflaged maintenance vehicle. The unpaved dirt road, untouched by heavy shelling or other signs of warfare, grounding the scene in a realistic, undisturbed village atmosphere.
Bringing the Story to Life: The Figures
A vehicle and a building set the stage, but the human element provides the narrative. To bring the scene to life, four figures have been added to the display:
Together, they create a palpable sense of a quiet rest before an impending recovery mission.
The scattered workshop clutter—jerrycans, tools and rags, spare wheels, and oil drums arranged right outside the intact garage—makes the temporary field workshop feel entirely authentic and lived-in.
Final Thoughts
Seeing the multi-layered weathering of the panzer—from the micro-chipping to the caked mud on the road wheels—tie directly into the earthy browns and dusty textures of the dirt road is incredibly satisfying. Every hour spent test-fitting, making rivets, and blending washes has culminated in this final presentation.
Thank you to everyone who followed along, left likes, praise and advice in the comments, and shared this building journey with me from the very first plastic cut to this final reveal. The bench is clean, and it's time to dream up the next adventure.
Good luck all with the votes!
73 days ago
Welcome back on my profile again!
The workbench is almost finally clear, and the Panzer I Ausf. F crane conversion is officially finished! After laying down the base camouflage scheme of Dunkelgelb, Rotbraun, and Olivegrün using the Gaahleri Aventus, the vehicle underwent an intensive multi-stage weathering process to transform it into a rugged, hard-working Bergepanzer.
Here is the exact step-by-step breakdown of how the finish was achieved after the initial camo layers:
With the vehicle fully weathered and the hoist rigged, this unique Bergepanzer I conversion is officially ready to take center stage in the French village diorama.
The last update will be Final Submission blog#23.
Thank you all for following this intense build journey from a rough short-run kit to a highly detailed, custom-converted piece of history!
Still some extra time to go, happy modelling!
73 days ago
Welcome back all,
The finish line has officially been crossed! After weeks of scratch-building, painting, and detailing the Bergepanzer I crane conversion, the entire project is near completeion For the final presentation, I built a dedicated diorama base to place the vehicle in its natural element—a quiet street scene in a French village.
The focal point of the backdrop is a house with a garage that is still completely intact, featuring a striking green garage door that provides a great faded color against the military tones of the panzer.
Here is how the diorama came together in the final stages:
Blocking in the Basic Colors
I started by laying down the foundational colors across the base to establish the different textures:
Weathering and Tying It Together
Once the base coats were locked in, the real magic happened through weathering. I paid special attention to the green garage door. I used physical rubbing, scrubbing, and weathering techniques to fade and wear away the green paint, exposing the bare, aged wood grain underneath to simulate years of exposure to the elements.
I then applied a series of different washes across the entire scene—dark pin washes for the architectural crevices and subtle grime streaks down the house walls. I followed up with extensive dry brushing using lighter tones of buff and off-white to bring out the rough texture of the wall and the packed dirt of the intact street.
The Final Details
To make the scene feel lived-in and busy, I populated the space with various battlefield and maintenance clutter. I scattered jerrycans, oil drums, and spare wheels around the crane vehicle to simulate a temporary field workshop set up right outside the garage. Finally, I added small plants and tufts of vegetation growing naturally along the base of the wall and the edges of the dirt road, breaking up the lines of the scene. last up will be adding the figures and positioning the Bergepanzer I.
Seeing the camo-painted Bergepanzer I sitting next to that realistically faded, scrubbed green garage door on an old French dirt road will make all those hours of scratch-building the crane and chain hoist entirely worth it.
Thank you all for still following along on this build journey from a finicky short-run kit to a complete historical scene. Only 2 blogs to follow. One will be the BergepanzerI and last the final submission for judging.
Almost time to clear the workbench for the next project.
Happy modelling!
73 days ago
Welcome back again!
We are finally at the most satisfying stage of any build: getting some real camo color on the plastic. With the scratch-built crane and that intricate chain hoist fully primed and prepped, it was time to move the Bergepanzer I conversion into the paint booth.
For the camouflage scheme, I decided to go with a late-war style, field-applied look over the dark grey base. I mixed up tones closely matching Olivegrün (Olive Green, RAL 6003) and Rotbraun (Dark Brown, RAL 8017). These colors give the vehicle that rugged, hard-working appearance suited for a front-line maintenance vehicle.
To spray the camouflage, I broke out my Gaahleri Aventus airbrush. If you haven't tried this brush yet, the control you get with the trigger action is fantastic for this kind of work. I thinned the paint down significantly to achieve a smooth, controllable flow, allowing me to spray tight, freehand soft-edge lines across the hull,
I will not paint the crane in camo, emphasising the later field add on. The crane itself, with all its scratch-built plates, rivets, and the custom trolley mechanism, really pops now that it has a unified coat of paint.
The camouflage does a brilliant job of tying the hull together into one cohesive machine. The contrast between the olive green and dark brown shapes looks incredibly striking against the top crane structure.
Next up, I will let the paint fully cure before locking it in with a gloss coat. Then, the real fun begins: putting on the decals, chipping, pin washes, and getting that grease and grime onto that chain hoist!
Thanks for stopping by the bench, and happy modeling!
73 days ago
With the crane arm securely mounted, it was time to tackle the mechanical heart of the recovery apparatus: the chain hoist. This component required some true old-school modeling resourcefulness, relying entirely on the spares box, styrene sprue, and thin plasticard.
First I had a search for some detailed pictures and blue prints of different old chain hoists. that was very useful in creating the different elements.
I used the plasticard and bits of shaved sprue to construct the intricate, boxy gear housing and the trolley mechanism that rides along the crane rail. I made a wheel for the hois chain, a separate teethed gear and axle to put inside the box.
Once the plastic construction was solid, I finished the look by using high-quality aftermarket metal chains. The weight and drape of the real metal chain add an incredible level of realism to the hoist, making this tiny assembly a real focal point of the build.
Next up will be putting on a black base coat, dry brushing in metal colors and adding some rust spots, oil and grime.
Thanks again for following along,
Happy modelling!
73 days ago
Welcome back everybody,
The heavy scratch fabrication phase for the vehicle is officially in the books. The scratch-built recovery crane is finished, base painted, and finally mounted in its home position on the Panzer I engine deck. The pivot point will be connected by a small styrene bar bolted off. The only element left is adding the chain hoist. That will be a small scratch project and blog on its own.
I decided to paint the crane structure in a clean dark sand yellow (Dunkelgelb) base coat to match the vehicle's underlying tone. Aligning the structural styrene beams onto the hull of the Panzer I Ausf. F required a lot of careful measuring and test-fitting, but seeing the crane finally fixed in place completely changes the silhouette of the vehicle. It finally looks like a dedicated, functional BergepanzerI.
Next up will be weathering the crane and finalising the tracks and fenders, putting on the camo on the hull only. This to make the crane stand out more as later field modification.
Thanks again for following along towards the final steps of this project.
Happy modelling!
73 days ago
The direction of this project just took an exciting turn. While brainstorming the perfect setting for the Bergepanzer I conversion, I hit absolute gold online. I managed to score a pre-built, resin diorama base of a French village street, featuring an unpaved dirt road, a standing house with a roadside garage.
Right now, the entire piece is sitting on the workbench in a monochromatic black and greyish base coat. While it looks like a ghost town at the moment, it is completely ready to be finalized. Having the primer coat done gives me the perfect canvas to map out the highlights, shadows, and the exact placement of the vehicle before I start laying down the final colors on the building and the landscape.
Next step will be to put on some gutters and door handle, the base colors using a buff for the wall, and faded green for the windows and garage door that will function as the back drop for the Bergepanzer I.
I will use a base wood color first before putting on the faded green. By scrubbing and washes I hope to get a nice weathered look on the door.
Thanks for rewatching this, commenting and liking my work!
Happy modelling !!

73 days ago
There was a security breach on the GWCC site apparently, so we have to bring back all my deleted data from AUG 31st onwards. Let's relive the moment :)
Happy modelling and at least we have more time all to submit our beautiful projects!
95 days ago
Welcome back to the workbench! Today, we are finally crossing the finish line on the custom crane modification for our 1/35 Alan Panzer I Ausf. F. If you have been following along, you know this little "Pocket Tiger" has been a test of patience, but today’s session brings some incredibly satisfying visual progress.
In this update, we are adding the final structural details—the tiny rivets and bolts—before locking everything in with a fresh coat of primer. Let’s dive in!
🔩 Step 1: Adding the Bolt Detail
The crane structure looked good after our last session, but it lacked that heavy, industrial, bolted-together appearance. To fix this, we used stretched sprue to create microscopic bolts.
💨 Step 2: Preparing for Primer
Because the Alan kit features very soft styrene, and our scratch-built crane utilizes a mix of plastic rods, sheet styrene, and cyanoacrylate (super glue) residue, getting a uniform surface is vital.
🎨 Step 3: Priming the Crane
For this stage, we opted for a high-quality surface primer applied via airbrush.
A neutral, dark primer was selected to act as a solid base for the upcoming red primer and final Dunkelgelb factory finish.
The magic of primer never gets old. Once the single, matte color coated the crane, all the different materials—the sheet plastic, the white styrene rods, and our custom bolts—unified instantly. The primer layer proves that our structural alignment is straight, the joints are solid, and the tiny bolt details pop beautifully against the matte finish.