GWCC OnlineHome
PartnersContestantsInfluencersCommunity
Login
GWCC Online
LoginSign Up
MethodWil_modeling cover image
M

MethodWil_modeling

@methodwilmodeling

Auto

261

Following

74

Followers

42

Updates

875

Likes

138

Comments

0

Votes

Project Summary

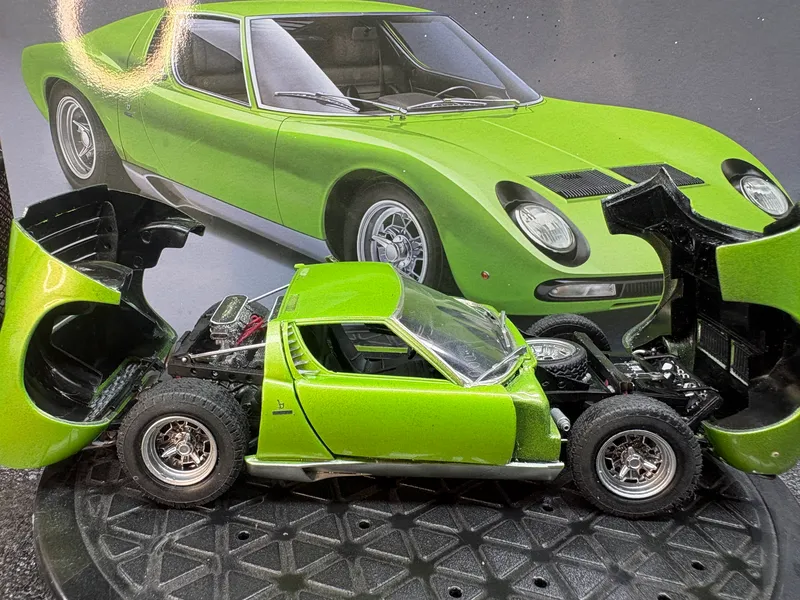
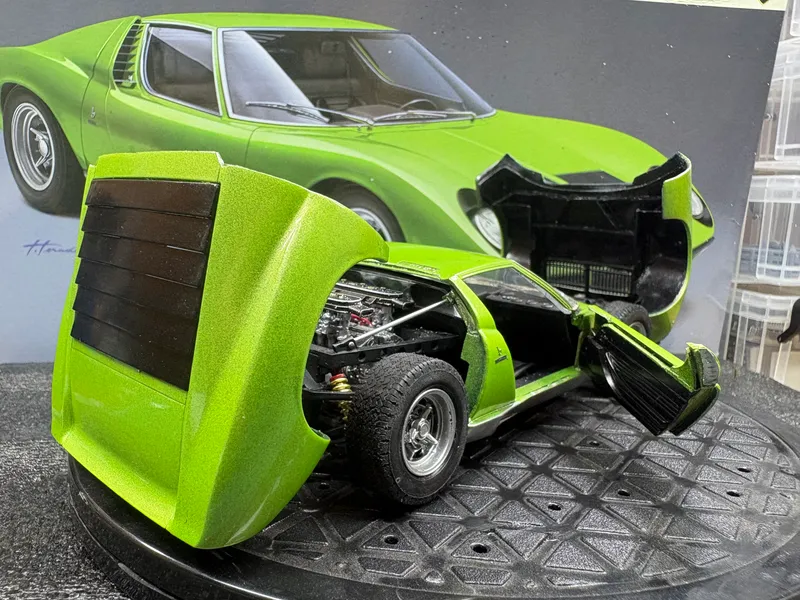
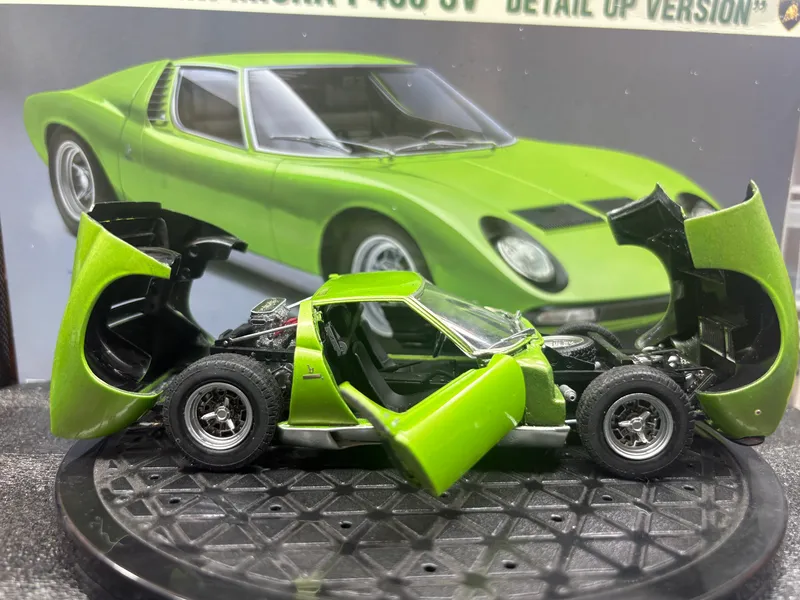
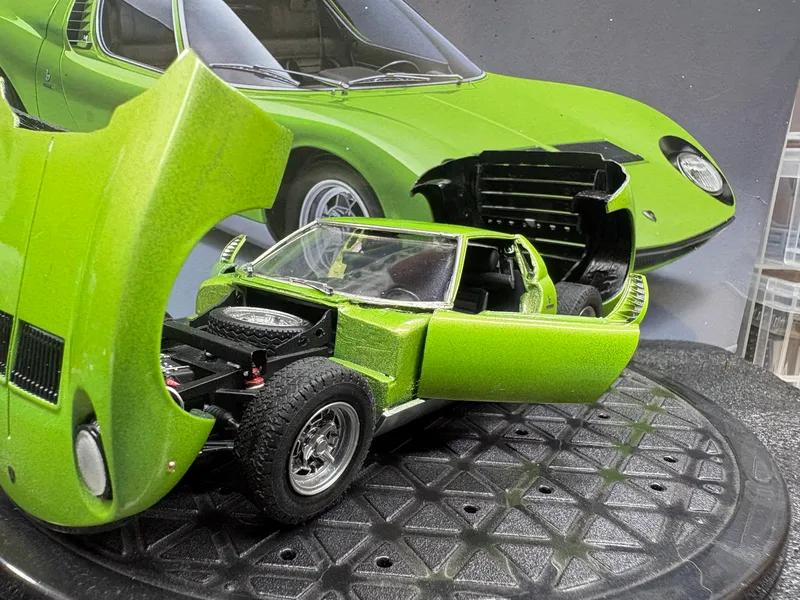
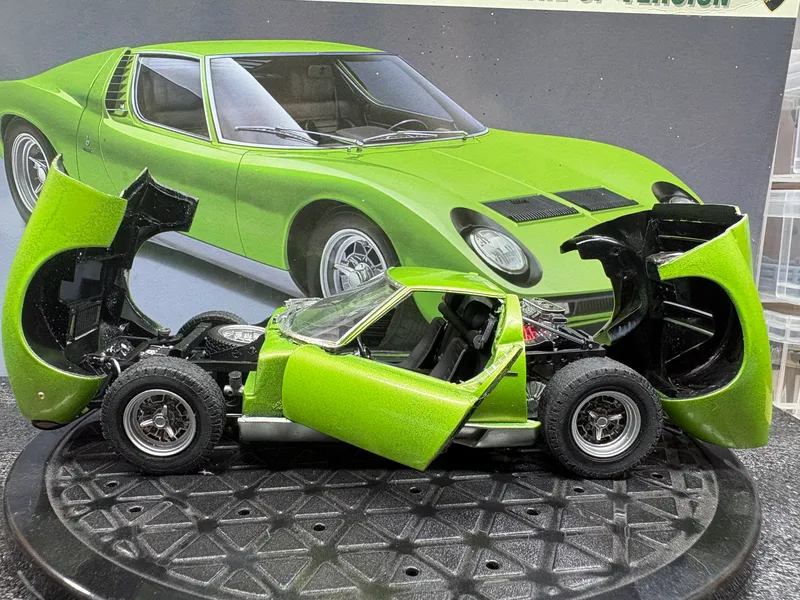
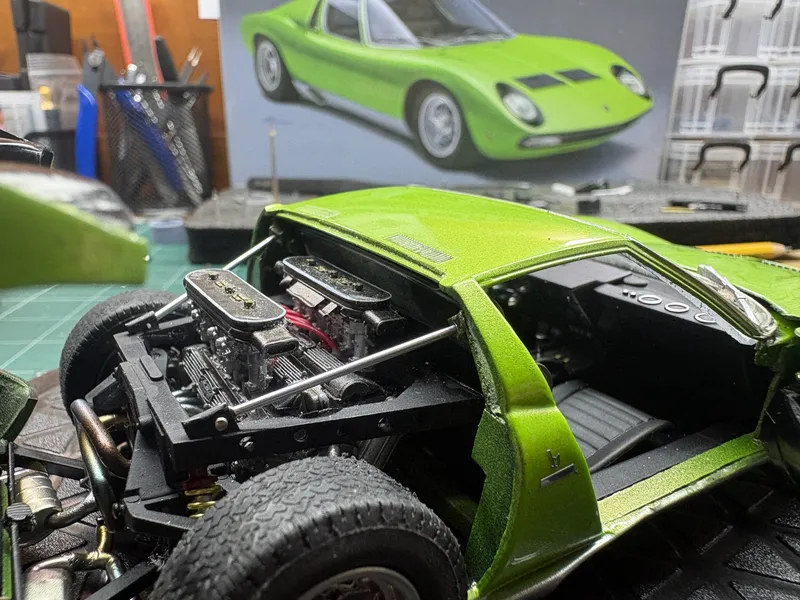
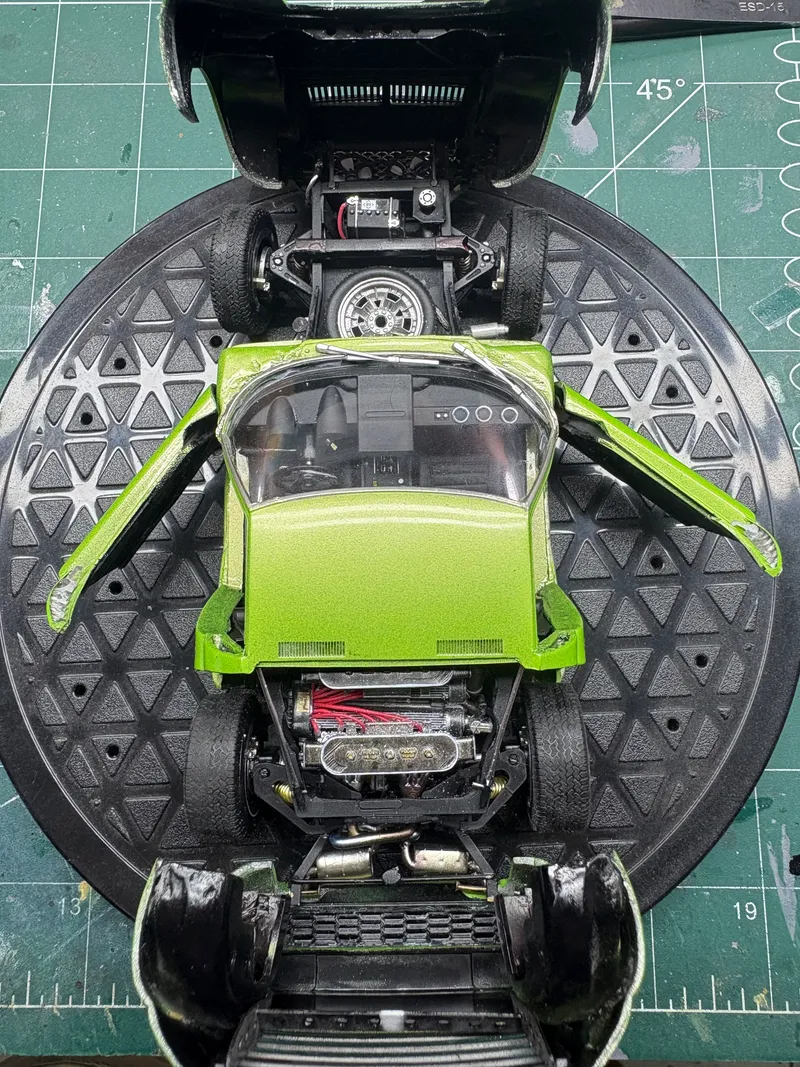
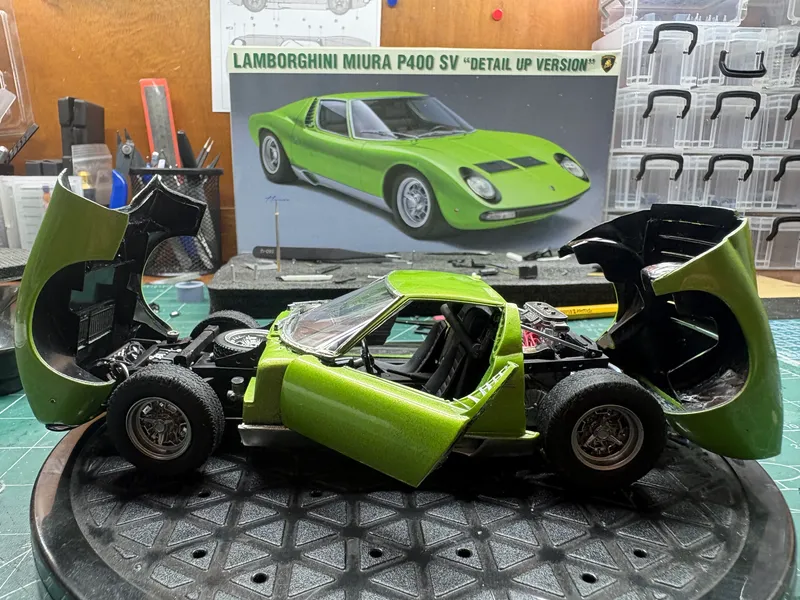
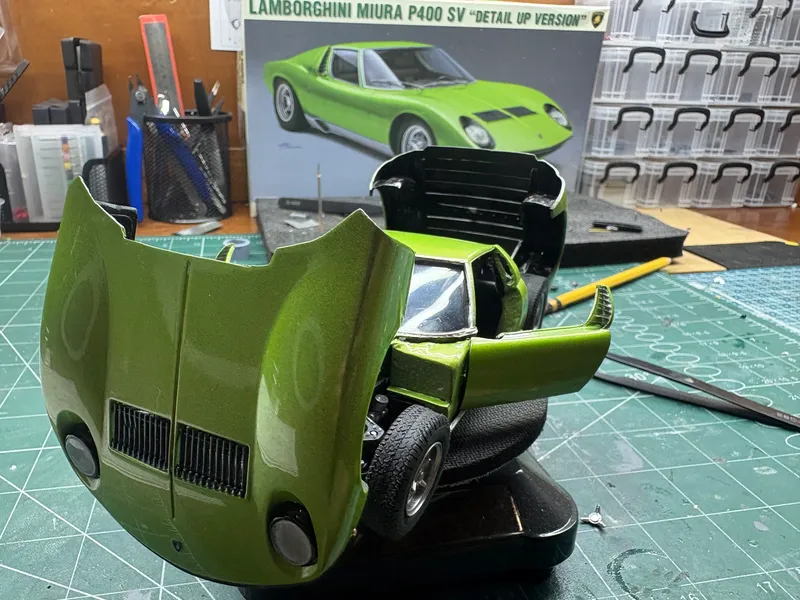
This project begins with the limited edition Lamborghini Miura P400 SV by Hasegawa in 1:24 scale. My goal is not to rush toward a perfect final result, but to enjoy the process of slowly transforming the kit through creativity, patience, experimentation, and attention to detail. I want this project to feel honest and personal from beginning to end, allowing the build itself to naturally evolve over time instead of trying to force a fixed idea from the start. Throughout the journey, I will be exploring different techniques, improvements, and modifications while sharing both the good moments and the difficult ones behind the workbench. More than anything, I hope this project reflects my genuine passion for building, learning, solving problems, and bringing small details to life little by little. Possible ideas for the project may include subtle structural modifications, additional detailing, custom fabricated parts, paint experimentation, and other small improvements that could help give the model more personality and realism as the build progresses. For now, I simply want to take the project step by step, enjoy the creative process, and allow the final direction of the Miura to evolve naturally over time.

Followers (74)
Mang JePS
MJ
AP
Christopher Koch
CK
T
john_n_porter
J
antampatz
A
From Resin to Pigments
FR
Karol Toszkiewicz
KT
studionaiya3d
S
Lorenzo Malatesta
LM
SM
Doug Mulle
DM
PowerCube
P
Maksymilian Spaczyński
MS
Łukasz Hajnrych
ŁH
Svee
S
Athe3D
A
Castrater408
C
STUDIO935
S
William Phillips
WP
Nguyen Dinh Duong
ND
Scott Fuller
SF
B
Hoolligan
H
One thing I really enjoy about this hobby is learning something new with every project. 1
One thing I really enjoy about this hobby is learning something new with every project. 2
One thing I really enjoy about this hobby is learning something new with every project. 3
One thing I really enjoy about this hobby is learning something new with every project. 4
One thing I really enjoy about this hobby is learning something new with every project. 5
Auto

9 hr ago

M

MethodWil_modeling

@methodwilmodeling | Auto

One thing I really enjoy about this hobby is learning something new with every project.

This is actually my very first time trying to recreate realistic titanium heat staining using the SNP Titanium Color Set. It definitely has a learning curve, and I’m still experimenting with how each transparent color interacts with the titanium base.

Every pass with the airbrush teaches me a little more about controlling subtle transitions instead of just adding color.

I’m far from mastering it, but that’s exactly what makes this Miura project so rewarding. Every new technique becomes another step forward.

Constructive feedback is always welcome. That’s one of the best parts of this amazing community.


Before and after: correcting the process, not hiding it. 1
Before and after: correcting the process, not hiding it. 2
Before and after: correcting the process, not hiding it. 3
Auto

18 hr ago

M

MethodWil_modeling

@methodwilmodeling | Auto

Before and after: correcting the process, not hiding it.

Last night was one of the biggest milestones of this Miura build. After weeks of preparation, testing and refinement, the body finally received its K306 color over the Silver Sealer.

Almost 24 hours later, a detailed inspection under direct lighting revealed a few localized areas with insufficient color coverage:

— Upper section of the left door
— Upper section of the left pillar
— Right rear corner of the rear body section

The surfaces were smooth, with no runs, reactions or physical defects—only localized dark mottling where the color had not developed uniformly.

Instead of sanding or restarting the entire paint process, I allowed the K306 to cure and approached each section carefully using a standard 0.3 mm airbrush.

The correction was built gradually:

— Light, controlled passes over the complete affected section
— Proper flash time between applications
— Each pass extended beyond the visible defect to blend naturally into the surrounding color
— Constant inspection from different angles to preserve the metallic orientation and overall tone

These before-and-after photos show exactly why patience matters. The objective was never to bury the problem under more paint, but to restore uniform coverage without disturbing the depth and brightness already achieved.

The corrections are progressing well, and the Miura is getting back exactly where it needs to be.

This is the side of scale modeling that is not always shown: small problems appear, decisions must be made, and sometimes the most valuable part of the build is learning how to recover cleanly.

How do you approach localized repairs on metallic or translucent finishes?

The goal remains the same: a championship-level finish.


Its so satisfying when things comes challenging and succesful as well

Your browser does not support embedded video playback.
The wait is over. 2
The wait is over. 3
The wait is over. 4
The wait is over. 5
The wait is over. 6
The wait is over. 7
The wait is over. 8
Auto

1 day ago

M

MethodWil_modeling

@methodwilmodeling | Auto

The wait is over.

Tonight, the Miura finally received its identity.

Countless hours of sanding, refining every panel, testing paint systems, experimenting on spoons, and trusting the process have led to this exact moment.

The K306 over the Silver Sealer delivered exactly the character I was chasing: a finish that constantly changes with the light, revealing new shades from every angle.

There is still a long road ahead—2K clear, polishing, final assembly and hundreds of details—but tonight feels like a true milestone in this journey.

Thank you to everyone following and encouraging this build. Your comments have made every update even more rewarding.

The best is still ahead.

Thanks for your support ! I’m really enjoying this !

A little side mission while the next big update is getting ready… 1
A little side mission while the next big update is getting ready… 2
A little side mission while the next big update is getting ready… 3
A little side mission while the next big update is getting ready… 4
A little side mission while the next big update is getting ready… 5
A little side mission while the next big update is getting ready… 6
Auto

2 days ago

M

MethodWil_modeling

@methodwilmodeling | Auto

A little side mission while the next big update is getting ready…

The Miura’s exhaust system is now receiving the attention it deserves.

Starting with a titanium base and a 0.2 mm airbrush, the next step will be building up subtle heat staining one layer at a time. No shortcuts—just patience and controlled transitions until the metal looks like it has lived inside a V12.

More to come… 👀


Your browser does not support embedded video playback.
Week 10 - THE MOMENT OF TRUTH 2
Week 10 - THE MOMENT OF TRUTH 3
Week 10 - THE MOMENT OF TRUTH 4
Week 10 - THE MOMENT OF TRUTH 5
Week 10 - THE MOMENT OF TRUTH 6
Week 10 - THE MOMENT OF TRUTH 7
Week 10 - THE MOMENT OF TRUTH 8
Week 10 - THE MOMENT OF TRUTH 9
Week 10 - THE MOMENT OF TRUTH 10
Week 10 - THE MOMENT OF TRUTH 11
Auto

3 days ago

M

MethodWil_modeling

@methodwilmodeling | Auto

Week 10 - THE MOMENT OF TRUTH

For weeks, every modification, every hour of sanding, every scratch-built detail and every test spoon has led to this exact moment.

The foundation is finally complete.

Last night, every body panel received its Silver Sealer, the layer that will determine the depth and character of the finish. The chosen color has been waiting on my bench for weeks… and tonight it finally meets the Miura.

This reel captures one of those moments that lasts only a few minutes but represents dozens of hours of preparation.

No shortcuts.
No rush.
Just patience, precision… and trust in the process.

Will the vision become reality?

See you in the next update.

GWCC 2026
Lamborghini Miura P400 SV
@methodwil_modeling


A question for fellow builders… 1
A question for fellow builders… 2
A question for fellow builders… 3
A question for fellow builders… 4
Auto

4 days ago

M

MethodWil_modeling

@methodwilmodeling | Auto

A question for fellow builders…

After assembling these photo-etched air intakes, I noticed something interesting.

The PE parts look incredibly sharp and scale-thin, but the vanes overlap enough that they don’t actually allow much airflow through them. The original plastic parts, while thicker, have open passages that are functionally closer to the real intake.

So here’s the question: Which would you choose—ultimate scale appearance or better functional accuracy?

I’m curious to hear how others approach this kind of trade-off.


My direction taken on this!

While the original plastic intakes are technically more open, the photo-etched parts bring a level of scale realism that's hard to ignore.
Sometimes the visual impact is worth a small compromise in functionality. That's the direction I'm taking with this Miura.

Your browser does not support embedded video playback.
Photo-etched parts are a different game. 2
Photo-etched parts are a different game. 3
Photo-etched parts are a different game. 4
Photo-etched parts are a different game. 5
Photo-etched parts are a different game. 6
Auto

4 days ago

M

MethodWil_modeling

@methodwilmodeling | Auto

Photo-etched parts are a different game.

Every vane had to be bent, aligned and installed one by one. Half an hour of patience turned into a 30-second timelapse... and it was worth every second.
The Miura keeps moving forward.

One more small step… and many hours behind it. 1
One more small step… and many hours behind it. 2
One more small step… and many hours behind it. 3
One more small step… and many hours behind it. 4
One more small step… and many hours behind it. 5
One more small step… and many hours behind it. 6
One more small step… and many hours behind it. 7
Auto

4 days ago

M

MethodWil_modeling

@methodwilmodeling | Auto

One more small step… and many hours behind it.

The outer air intake is now integrated into the body after carefully creating a tiny channel for a perfect fit. Then it was back to gloss black to recover the finish.
Next comes the photo-etched inner vanes… one blade at a time. These are the details that make the journey so rewarding.
More soon


Your browser does not support embedded video playback.
A quick look at some of the scratch-building tools I use on the Miura project. 2
A quick look at some of the scratch-building tools I use on the Miura project. 3
A quick look at some of the scratch-building tools I use on the Miura project. 4
A quick look at some of the scratch-building tools I use on the Miura project. 5
A quick look at some of the scratch-building tools I use on the Miura project. 6
Auto

5 days ago

M

MethodWil_modeling

@methodwilmodeling | Auto

A quick look at some of the scratch-building tools I use on the Miura project.

Several people asked about the mini lathe used on this project...

So here it is.

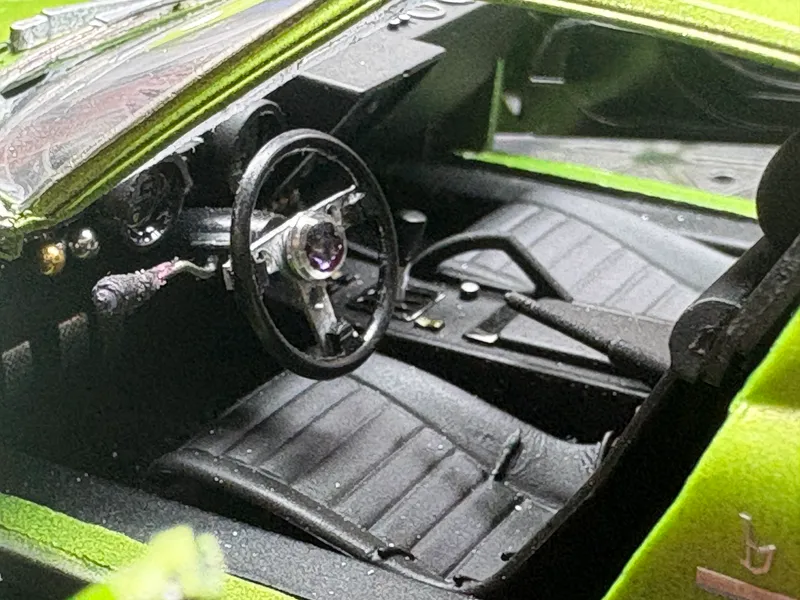
This tiny machine helped turn a simple piece of aluminum into the steering wheel hub for the Miura. A small component, but one that completely changes the feeling of the interior.

Sometimes the smallest details tell the biggest story.

One step at a time, enjoying the journey day by day.

One step at a time 1
One step at a time 2
One step at a time 3
One step at a time 4
One step at a time 5
One step at a time 6
One step at a time 7
One step at a time 8
Auto

5 days ago

M

MethodWil_modeling

@methodwilmodeling | Auto

One step at a time

While the main assembly continues, it's time to work in parallel on the complete exhaust system. Now comes the fun part: choosing the right metallic finish... or recreating real heat staining with dedicated titanium colors.

Sometimes the hardest decision isn't building the part... it's deciding how to bring it to life.

Stay tuned... 🔥

Biography

Scale model creator from Costa Rica. I build cinematic 1:24 scale machines focused on realism, engineering, and emotion — combining scratch-building, resin 3D printing, advanced paintwork, and obsessive micro-detailing. Every project is more than a model: it is a journey of craftsmanship, problem-solving, and storytelling. Currently building toward the Gaahleri World Creator Cup. Welcome to the workshop of MethodWil_Modeling.

methodwil_modeling
Builder's Toolkit

Mobious-GT

Air Compressor GT-918

Nedeco airbrushes

Kaleido Color Works

Createx Colors

SMS 2k CLear

SNP Color