
_modelowy_start_pl
@modelowystartpl
102
Following
76
Followers
27
Updates
662
Likes
150
Comments
0
Votes
@modelowystartpl
102
Following
76
Followers
27
Updates
662
Likes
150
Comments
0
Votes
47 days ago
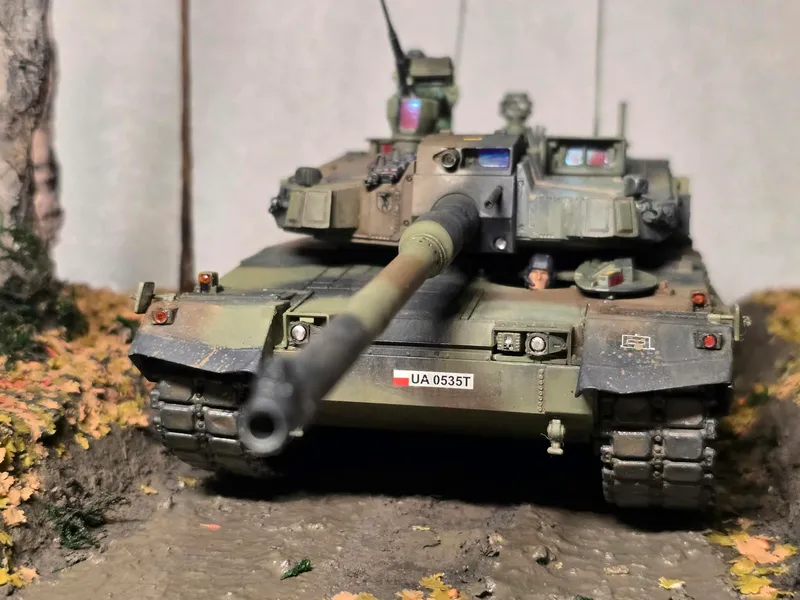
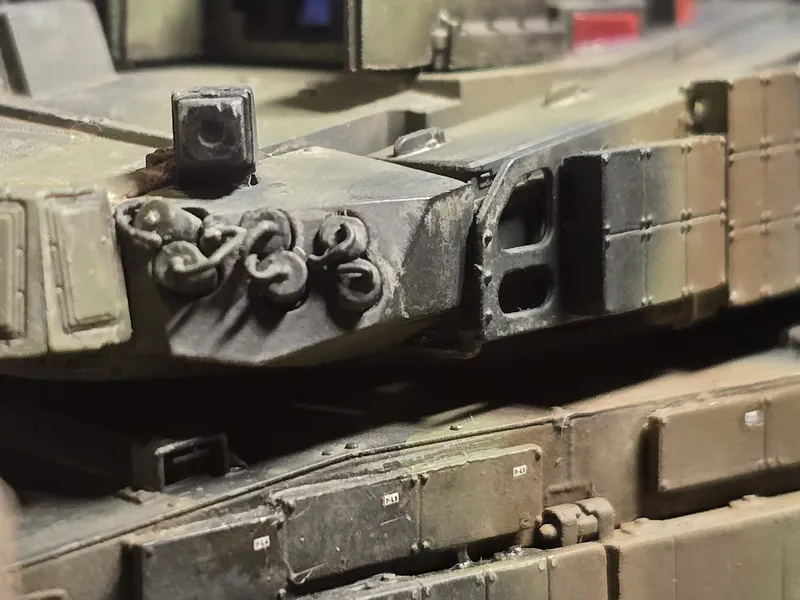
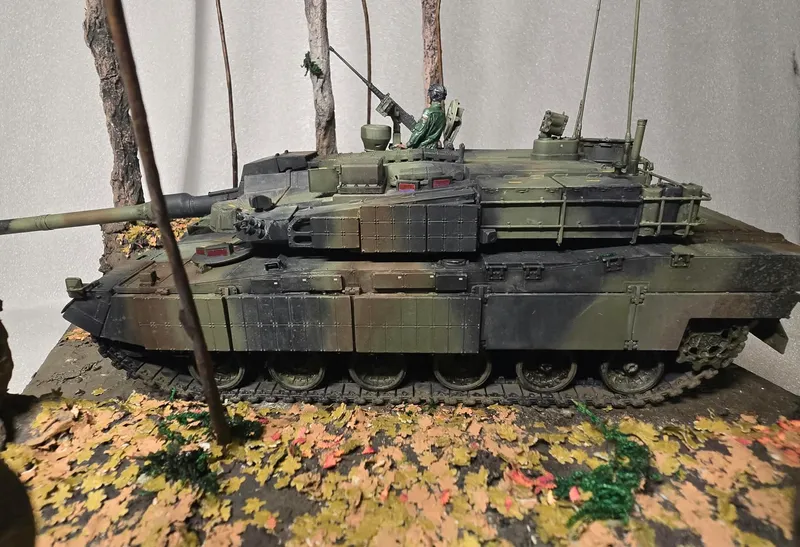
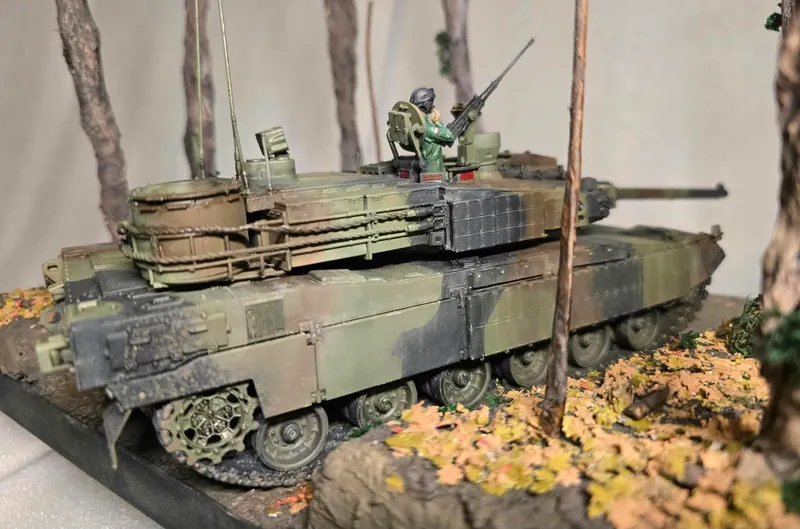
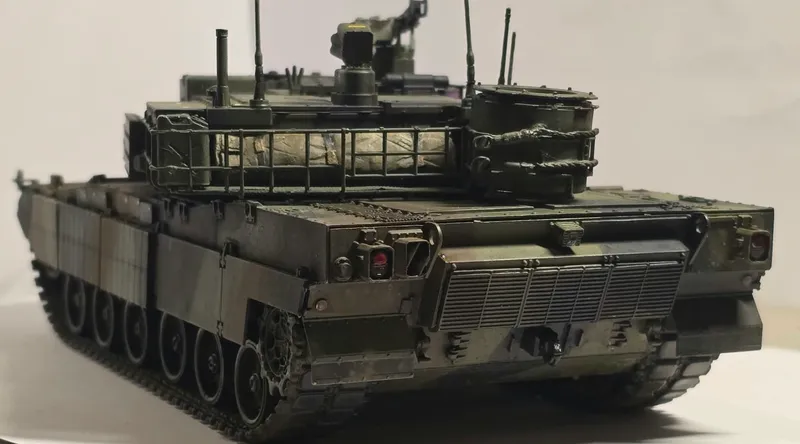
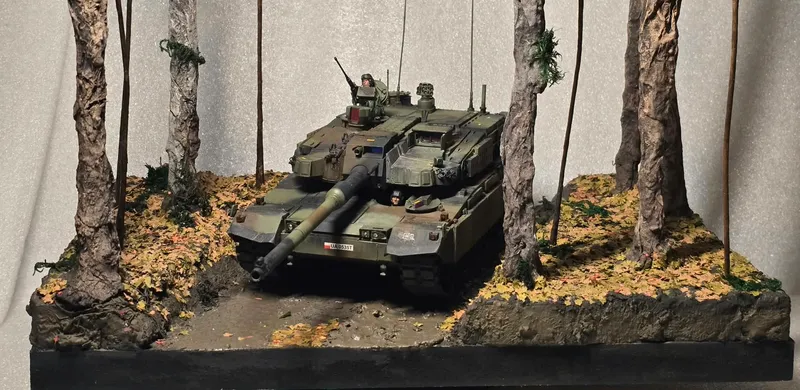
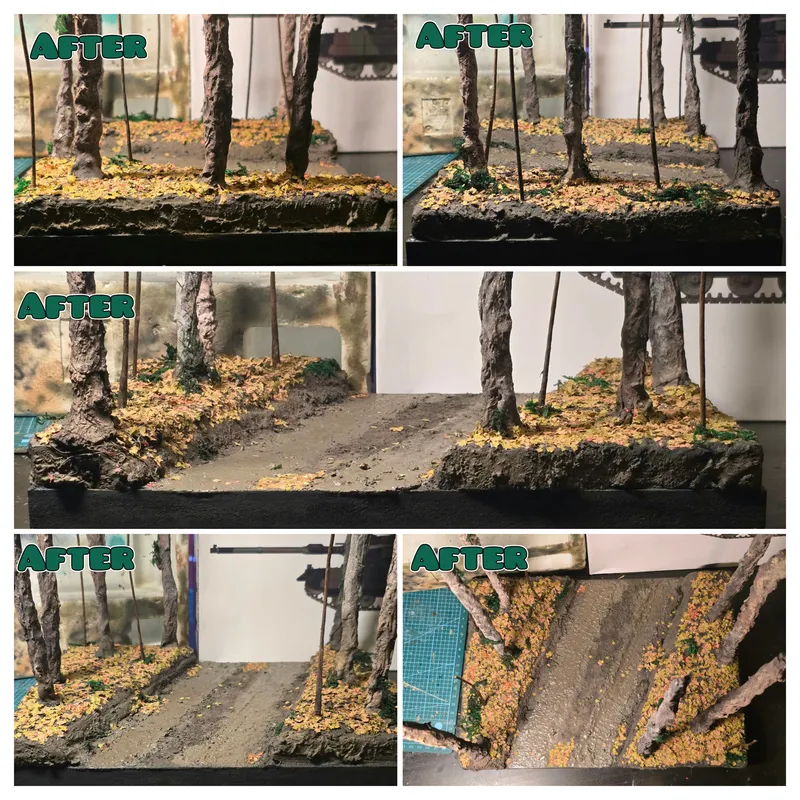
(My final repost) September 6, 2026. This is my final post for this project, and my final entry for the GWCC 2026! The tank you see is the 1/35 scale model kit of the K2 Black Panther from the 20th Mechanized Brigade (20 Bartoszycka Brygada Zmechanizowana), based on references from May 2023.
I wanted to tell a story rather than just building it straight out of the box, so I added two crew members, aftermarket detail parts, and custom scratch-built elements while documenting the entire journey.
I wanted the tank to look well-used and a bit dirty to match the harsh operational environment as it drives and navigates a muddy woodland track in early autumn.
Working on the K2 inspired me to push my limits and take on a bigger challenge, leading to the diorama as a later addition to showcase the tank traversing wet, muddy terrain surrounded by forest. Since many reference photos feature vehicles operating in dense woods or open muddy fields, I decided to build custom trees and fill the scene with natural details featuring Scots pine and Silver birch—two of the most common and ecologically important trees in the Polish landscape.
As I mentioned in my previous post, the diorama is designed from a low-angle perspective, featuring tall, cut-off forest pines and slender wire-stemmed undergrowth trees surrounding the scene. This creates an immersive and realistic woodland atmosphere that captures the feel of an early-autumn forest, where bright, freshly fallen yellow leaves contrast against the darker, wet brown humus beneath them.
I am thrilled with how everything turned out. It was stressful at times, but I had a lot of fun learning, pushing myself, and applying a wide range of skills and techniques to this build.
A massive thank you to all the wonderful people who followed along here your comments and encouragement are actually what gave me the idea to tackle a diorama in the first place!
-----------------------------------------------------
It's a real shame what happened this week, but at least the extra time gives more people a chance to finish off their projects. It just goes to show how truly supportive and helpful the modelling community is toward one another, especially with everyone going back to like and comment on reposted posts. Thank you all so much for the incredible support. I wish everyone competing the absolute best. It has been a fantastic experience, and I am grateful to have been a part of the GWCC 2026.
47 days ago
(This is a repost) September 5, 2026. I’ve spent this entire week focusing on finishing my diorama, and it is finally complete!
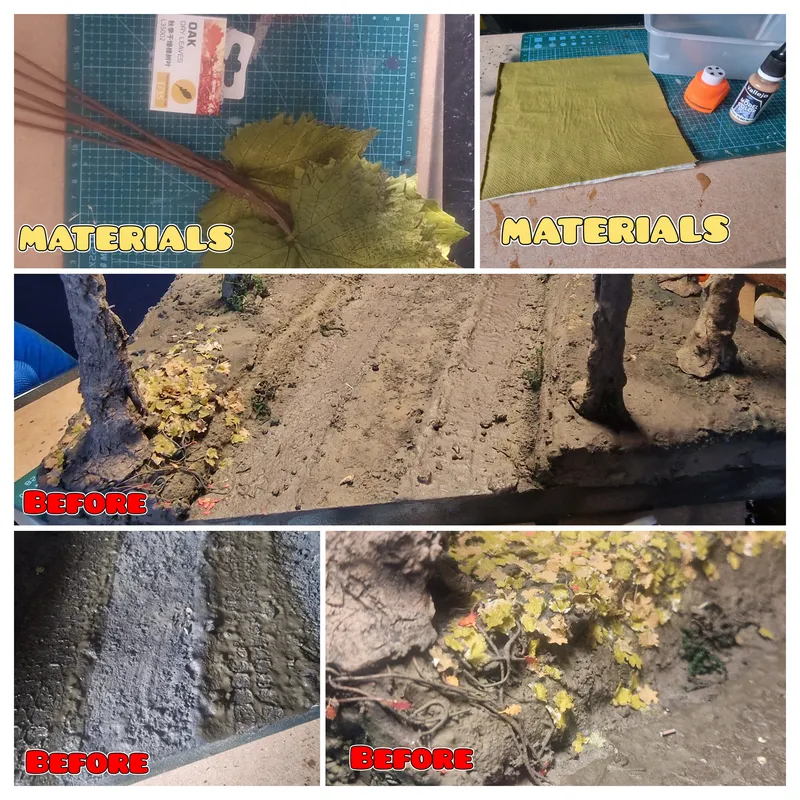
For the foliage, I used paper napkins from my local shop alongside AK Leaves Punch Maple (1:35 Scale – AK9172). I painted the punched leaves with Vallejo Cork Brown to achieve an early-autumn look.
The forest floor is carpeted with bright, distinct yellow leaves that haven’t yet decomposed into the dark, wet brown humus beneath them. Since I only had one small box of oak leaves (L35002), I had to use them sparingly.
My original plan was to punch leaves out of artificial decorative material I bought from my local art shop, but the embedded metal mesh proved far too tough for the leaf punch.
However, that little hurdle actually inspired me to use the leftover material for saplings and undergrowth.
The diorama is designed with a low-angle perspective, featuring tall, cut-off forest pines alongside wire-stemmed undergrowth trees to create a more immersive and realistic woodland feel. When I noticed that my initial track impressions weren’t standing out as much as I wanted, I experimented with AK Splatter Effects Dirt (AK8035).
It took a few tries, but I eventually managed to press crisp, realistic track ruts using spare tracks from my K2 donor kit. Once the mud had dried, I applied A.MIG-1406 Damp Earth and scattered a few leaves into the wet mud to give it a more organic, saturated appearance. I secured everything using a standard PVA-and-water mix. The process took a little time, but I think it was absolutely worth it.
For the final detailing, I used some leftover fake moss, painted the smaller trees with Vallejo Black Brown (70.822), and applied Tamiya Black Panel Liner to bring out the details. I also used Vallejo Black Brown on parts of the ground alongside my trusty A.MIG-1403 Nature Effect Dirt.
For the base structure, I laid down Tamiya LP-60 NATO Black, protected the roadway, and sealed the banks, ground, and trees with AK Ultra Matte Varnish (AK183).
47 days ago
(This work is a repost, and I will be reposting the rest of my work that was deleted.)
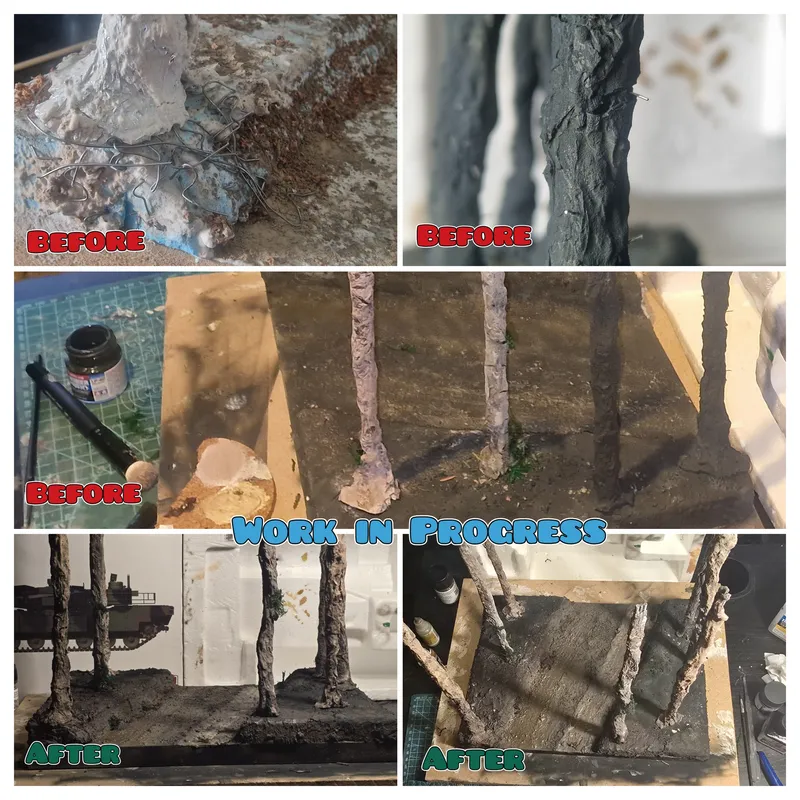
August 31, 2026. I’ve been working away on my diorama, and it’s almost there! To achieve a more natural look, I adjusted two of the trees and shifted their positions. I primed the base and trees with Tamiya LP-60 NATO Black and experimented with 0.2mm lead wire on two trunks to represent small branches.
The scene features Scots pine and Silver birch, two of the most common and ecologically vital trees in the Polish landscape. For the Scots pines, I built up the colours using Vallejo USAF Olive Drab (71.016), Black Brown (70.822), and Saddle Brown (70.940), followed by Tamiya Black Panel Line Accent Colour and a dab of Buff oil paint left over from my tank build. The tree vines and lead wire branches were painted with Saddle Brown.
For the Silver birches, I used Vallejo White (70.951), USAF Olive Drab, Sand Yellow (69.033), and black panel liner. I picked up some fake moss from my local art store—extremely handy for both the birch trunks and the forest floor—and darkened it slightly with Vallejo Black Brown, which I also used for the dirt base.
For the ground textures, I applied AMMO MIG-1403 Earth across the main terrain and road, and used AMMO MIG-1406 Damp Earth along the raised embankments where the tracks run.
It took some experimenting to nail down the tree colours, but for my first-ever diorama, I’m really happy with how it’s coming together. I’ve had a blast making this. It’s still a work in progress, but we are very close to the finish line!
57 days ago
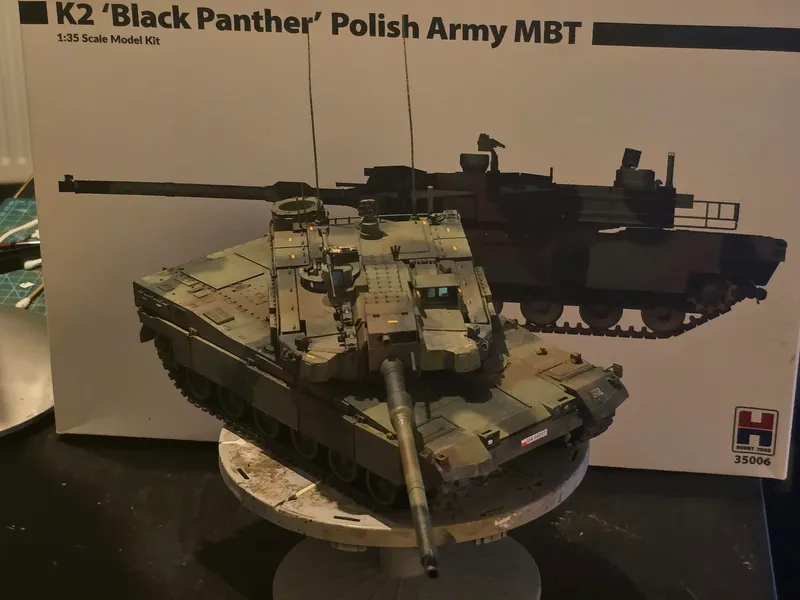
August 30, 2026. Quick update on the K2. The vehicle build itself is officially complete. I applied the decals with Vallejo Decal Fix, added mud textures to the tracks with Europe Earth A.MIG-3004 and A.MIG-1406 Damp Earth and did a few touch-ups. But this isn't the final result!
Stay tuned over the coming days as I shift focus to building and finishing the forest diorama. 😁🔨🛤
58 days ago
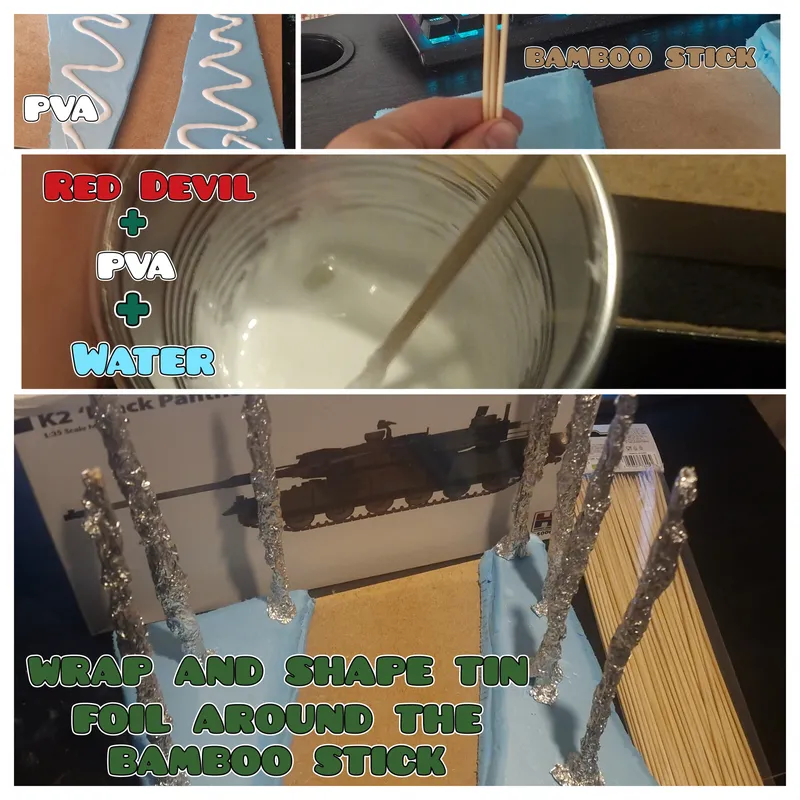
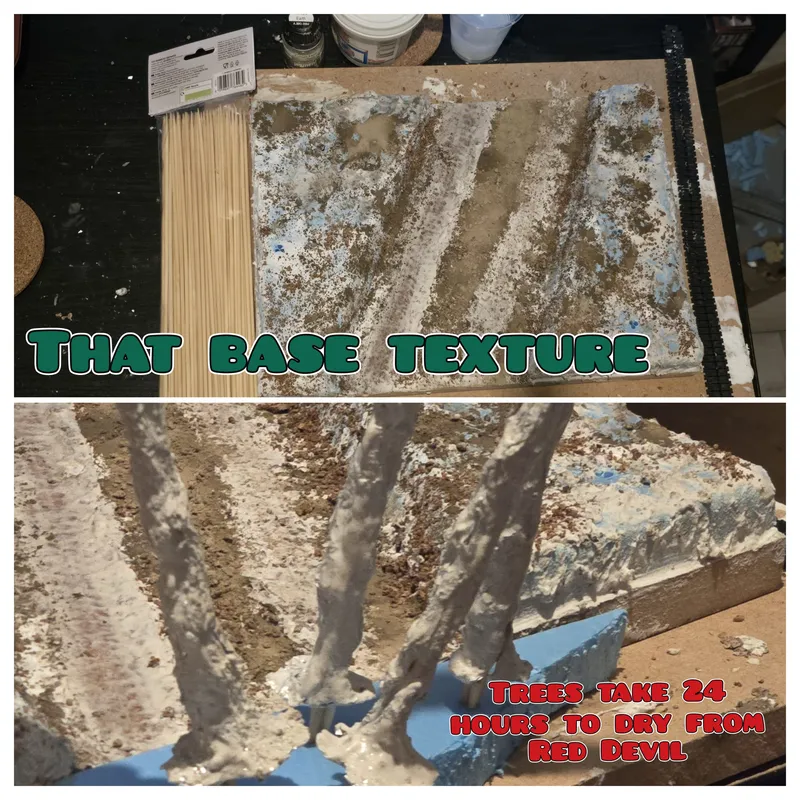
August 29, 2026. I finally started working on my diorama, and this is my first-ever proper diorama! I started by taking some measurements and cutting the foam. In my original sketch, I was supposed to have the foam blocks facing straight forward, but I decided to set them diagonally instead.
I liked this layout much more, since the angled mud road makes it look like a real turn. I used a Tamiya hobby saw and a hobby knife to carve and shape the foam, then cleaned everything up with a sanding stick. Looking at the base, I thought to myself that it felt a bit empty. In the reference pictures I looked at for research, I noticed far more tanks surrounded by dense forest rather than open, flat clearings. That made adding more trees feel like the right fix, so I improvised by taking bamboo sticks and sticking them into the foam to build up the forest.
At first, they looked way too thin for 1/35 scale, so I wrapped them in tinfoil to bulk them up and shape them. From the research I did, you don't really see trees being short in European forests like those in Germany and Poland. They're usually very tall and skinny in dense forest areas. I made the trees tall so that having them extend out of frame gives a real sense of scale. I also made sure I could easily pull the trees out of the base so I could work on detailing them separately later. Next, I mixed Red Devil lightweight spackle with PVA glue and water to coat as much of the base as I could. I used the tracks from my donor K2 kit to press realistic track marks straight into the ground mixture.
To get a great soil texture, I grated a cork coaster over the base and added some A.MIG-3004 Europe Earth pigment. Finally, I used the Red Devil mix to coat the trees as well. Now everything has to dry for 24 hours before I can start applying any paint.
While it cures, I can move on to putting the final touches on the K2! 👀
60 days ago
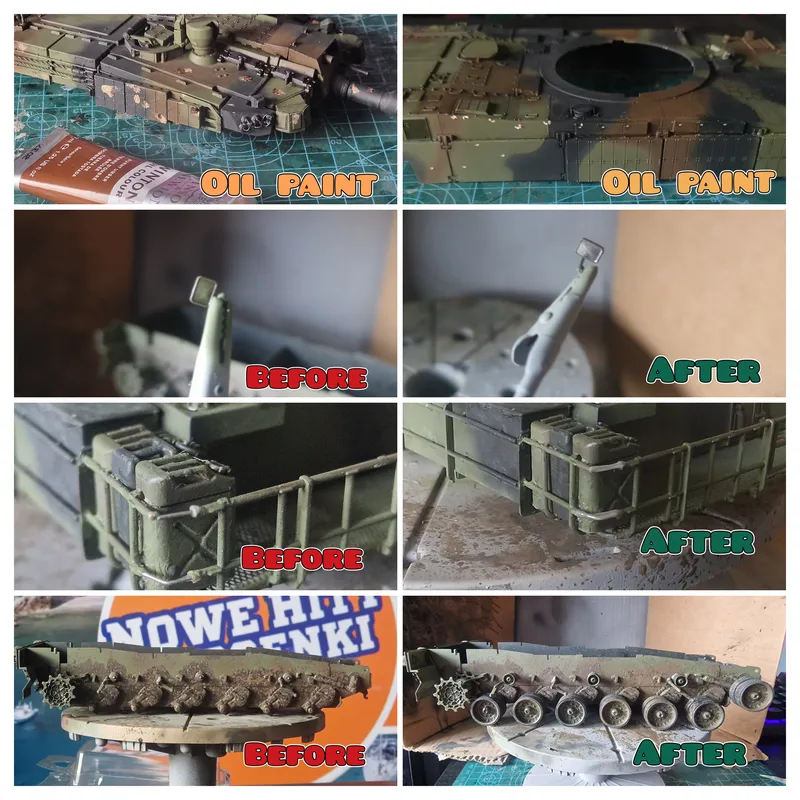
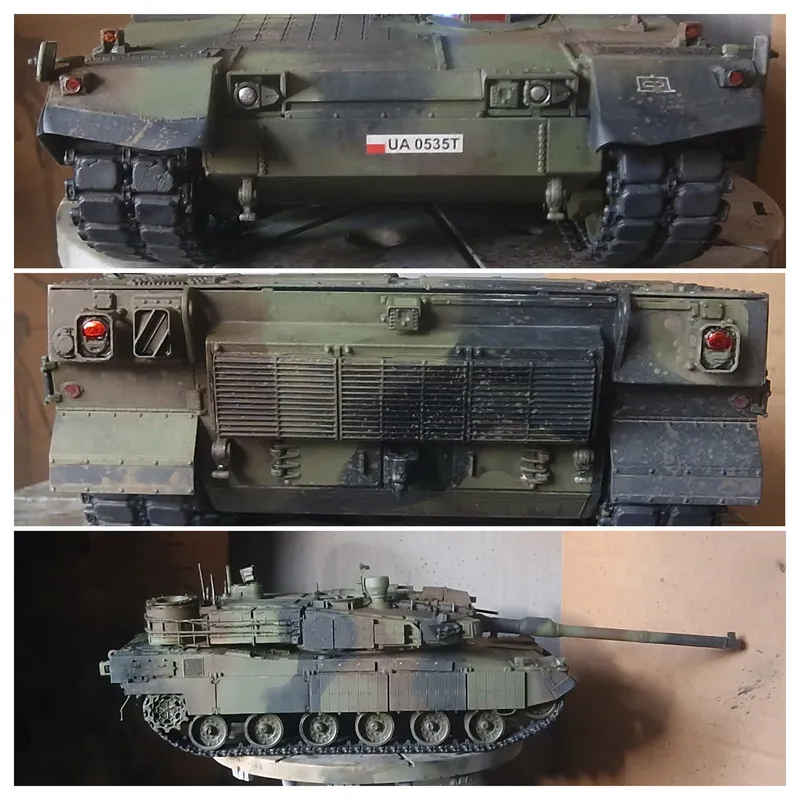
August 26, 2026. A lot of great work was done on the K2 today! Since the tank was already sealed with Mr Colour GX114 Super Smooth Clear, I applied a few decals first.
After that, I moved on to using Tamiya Black Panel Line Accent on the turret and hull. Once I cleaned up the excess panel liner, I focused on adding the finer details. For the main headlights and the actual mirrors, I used a Molotow Liquid Chrome pen to create a mirror-like effect. For the front and rear lights, I combined the chrome base with RC824 Clear Orange and RC821 Clear Red to make them look more realistic. Next came my first experience using oil paints for weathering and a pin wash, and I genuinely enjoyed it! Since I couldn't get a pre-mixed buff colour locally, I mixed my own using three oil paints: Burnt Umber, Soft Mixing White, and Naples Yellow Hue.
For the dust and dry mud effects, I used AMIG-1403 Earth.I also had to make a quick repair after an accidental drop knocked off the mounting bar for the jerry cans 😮💨
Since I had run out of Tamiya Extra Thin Cement, I improvised by using 0.02 mm lead wire and some melted plastic to cover the wire and restore the bar to its proper thickness. For the lower hull and running gear, I layered AK8035 Splatter Effects Dirt, AMIG-1403 Earth, and AMIG-1406 Damp Earth across the suspension and road wheels.
The tracks were finished with AK183 Ultra Matte Varnish and are now ready for some final mud pigments later on. The K2 is sitting at around 95% complete now, with just a few finishing touches left. I'm really happy with how everything is coming together.
With more diorama materials gathered, I'm ready to dive into that next and hopefully share another progress post soon. The days are flying by, and we're almost at the finish line! 🐈⬛🇵🇱
65 days ago
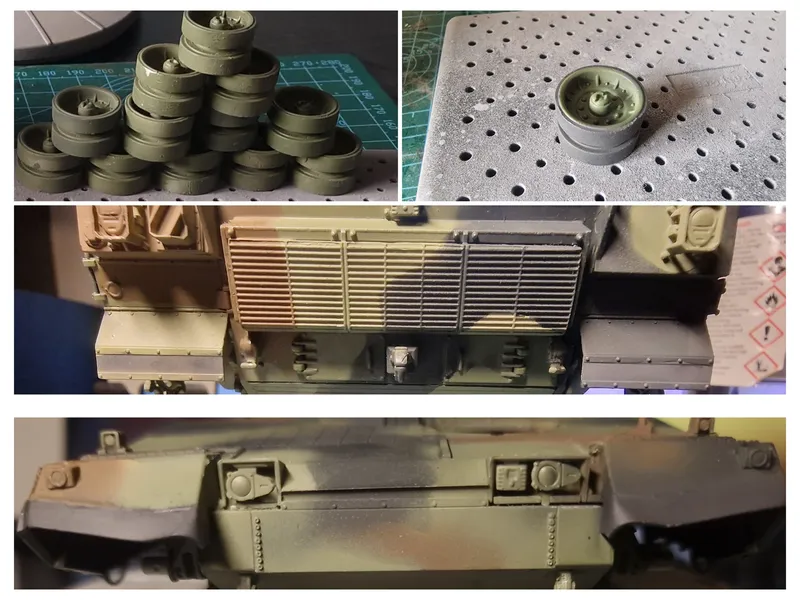
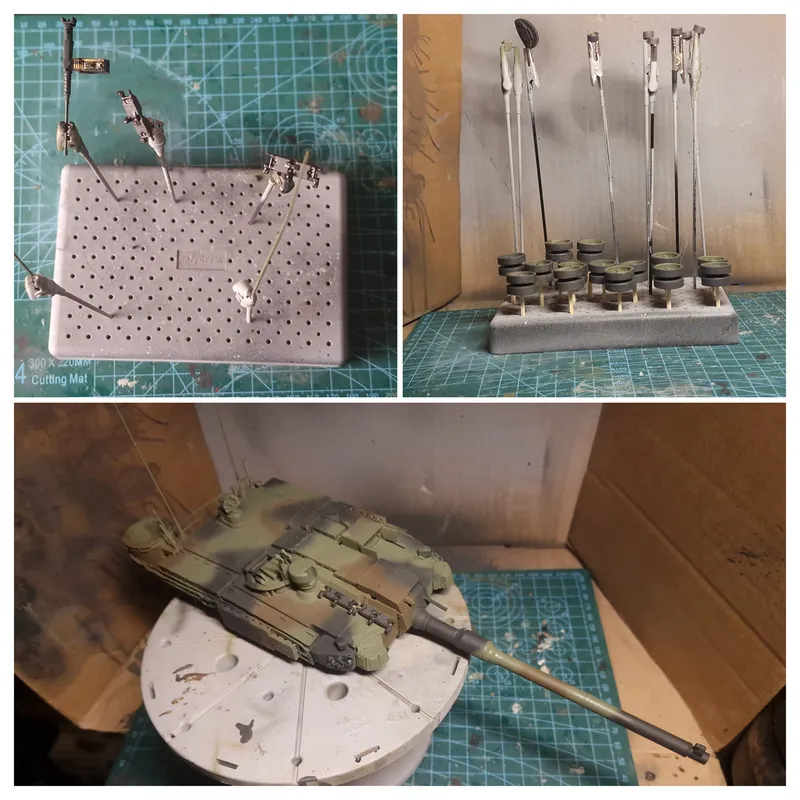
August 22, 2026. The K2 is almost done! I worked on a few more details with paint today, starting with the wheels and track armor. I painted the wheel rubber using Italeri Acrylic 4861AP Flat Rubber and used Mr. Hobby H320 for the green antenna bases.
For the roof track armor, I used Italeri Flat Rubber for the pads and Mr. Hobby C28 Steel for the metal parts, Next, I tackled the hull details. I painted the bottom part of the driver's hatch in Tamiya LP-60 NATO Black since it will be left open, and painted the front flap and lower black flap area using Vallejo 70.862 Black Grey.
For the weaponry, I used Mr. Hobby C28 Steel and H320 on the .50 cal and ammo box as needed. I also tried something new using AK Interactive AKM034 Brass and AKM033 Copper acrylic paint markers to detail the individual ammunition rounds inside the box.
To finish up for tonight, I applied Mr. Color GX114 to the tank, wheels, hatch, and mirrors using light mist coats. I held off on the tracks and .50 cal for now, as I'll be using a different varnish on the gun assembly tomorrow.
I’ll leave the tank to cure overnight and check on it tomorrow. After that, just a few tiny details like the headlights and the weathering are left. Since I know many of you guys want to see it weathered, stay tuned!
71 days ago
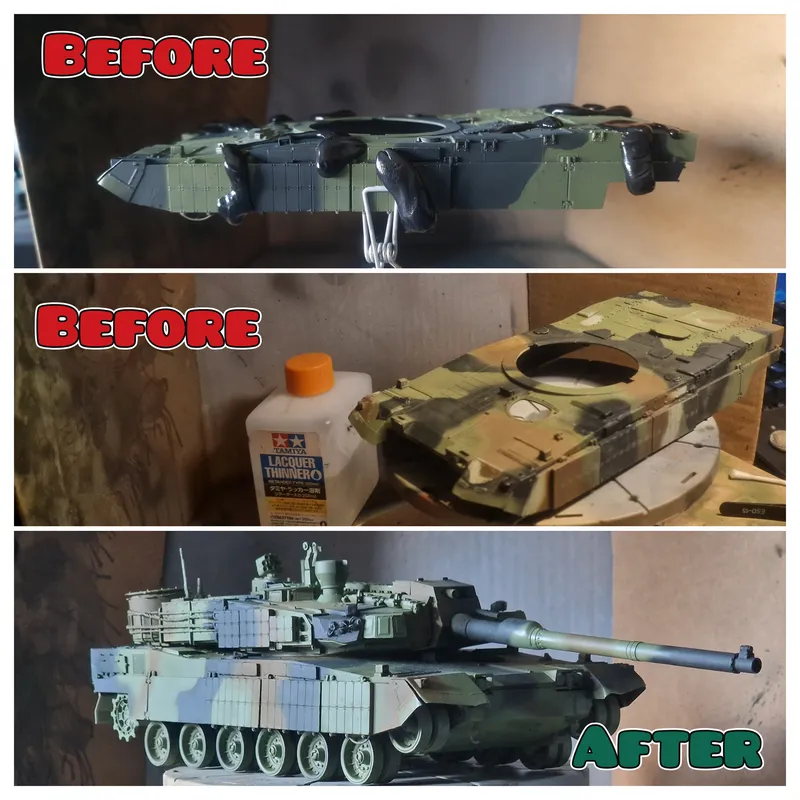
August 15, 2026. Over the past week, I have been working away on the camouflage. After fully coating the tank with Mr Hobby H320 Dark Green as the base colour last week, I added a few more light layers of the same green to build up the colour.
For the camouflage pattern, I tried using AK Camouflage Elastic Putty (AK8076). Personally, I have mixed feelings about the product. It can get quite sticky quite quickly, especially in a warm environment, so I had to be more careful while working with it. That said, some of the patterns would be extremely difficult to paint freehand, so I’m still happy I gave it a try.
For this build, I ended up using a combination of the putty and freehand airbrushing, which I think worked out pretty well.
For the next colour, I went with Tamiya LP-60 NATO Black. As I mentioned in a few previous posts, I really like this colour for the K2 because it isn’t completely black it’s dark enough without being too harsh.
I then used Tamiya LP-57 Red Brown, which is another colour I really like. After finishing the camouflage, I’m very happy with how the overall pattern turned out.
The next stage will be adding weathering and painting further details. For now, I’m finally leaving the K2 to cure overnight before moving on to the next stage!
76 days ago
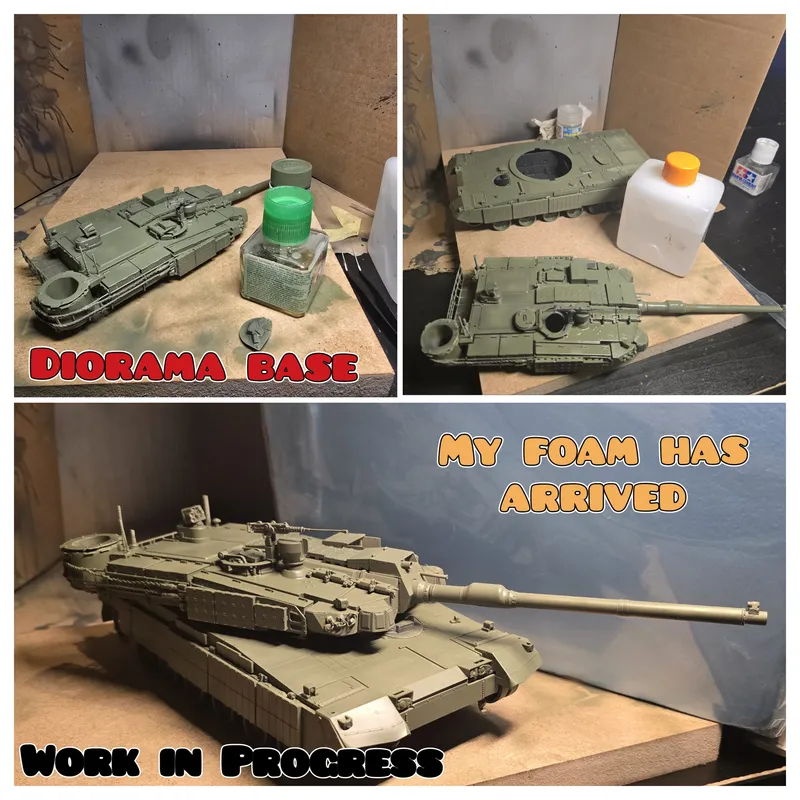
August 11, 2026. Today I finally sprayed the green base coat over the entire tank! I’m building a 2023 Polish K2 from the 20th Bartoszycka Mechanical Brigade in Morąg.
The first 180 K2s delivered to Poland arrived in standard three-colour NATO camo (black, green, brown) to match their existing armour. I’ve always really liked the classic NATO look, and since it’s still actively used alongside newer Polish patterns, it’s a spot-on choice for this kit.
I originally started on the lower hull with Tamiya LP-56, but ran dangerously low mid-spray and switched to Mr Hobby Aqueous H320 Dark Green.
Thankfully, the shade looks fantastic. It dries semi-gloss, but a flat clear coat before weathering will fix that easily. All that’s left for now are a few quick airbrush touch-ups on the turret, so work is still in progress
As for the diorama, I got the wooden base which I will be using and my blue XPS foam has arrived as well. Once the K2's camo gets more worked on, I’ll start cutting and shaping the terrain for the diorama








