Bughunter
@bughunter
42
Following
121
Followers
33
Updates
1359
Likes
457
Comments
0
Votes
97 days ago
The cockpit
Finally, it's time to work on the cockpit. I have so many things on my ToDo list, I need to hurry up!
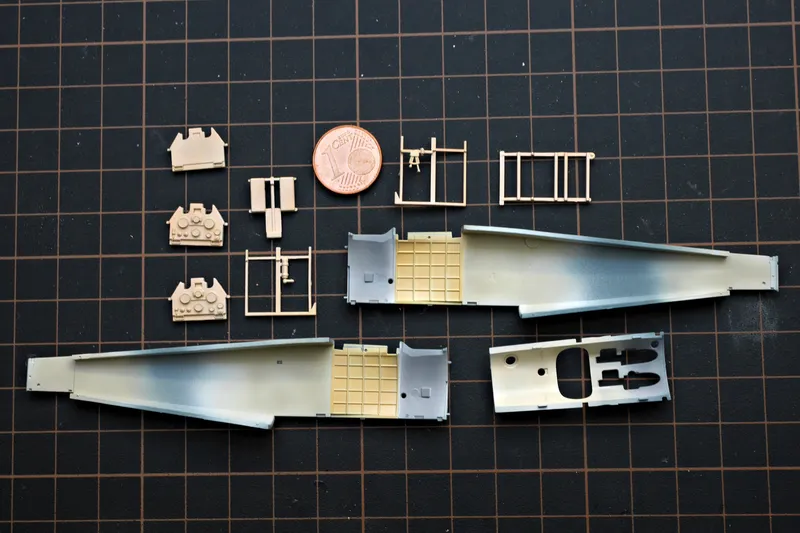
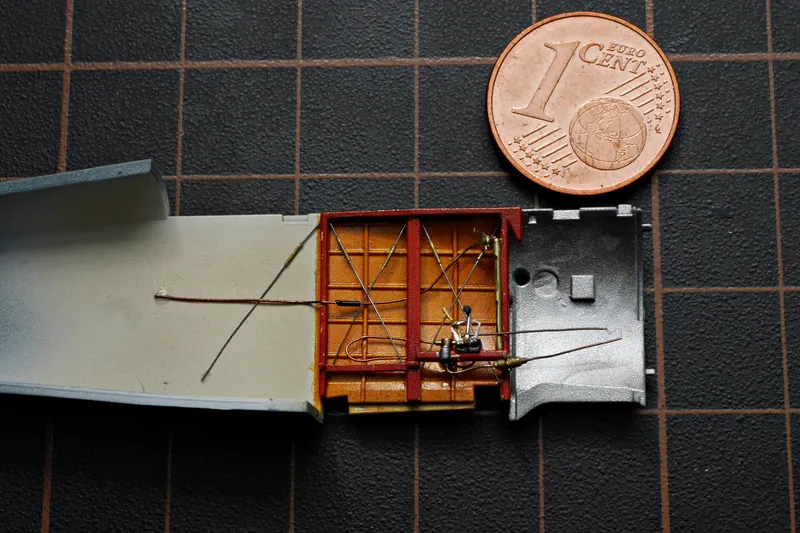
Pic 1 There was already white primer in the first update. Now I painted linen and beige as preparation for the wooden parts.
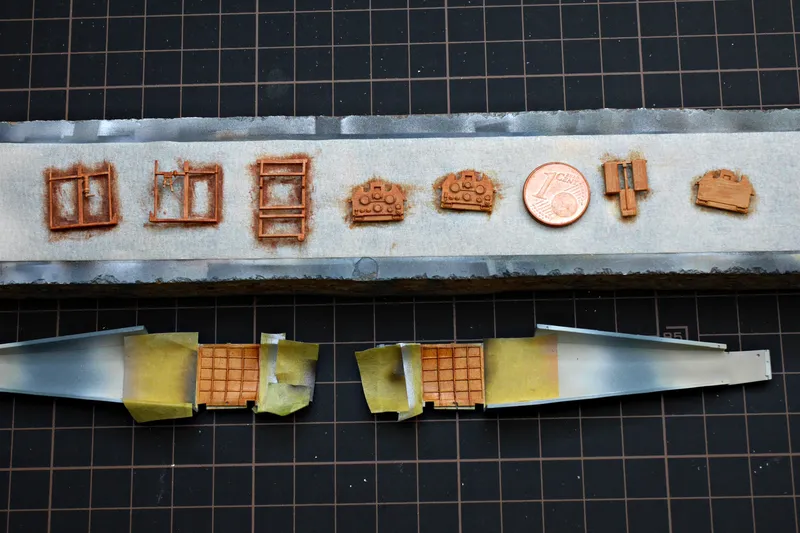
Pic 2 The wood grain was made using oil paints.
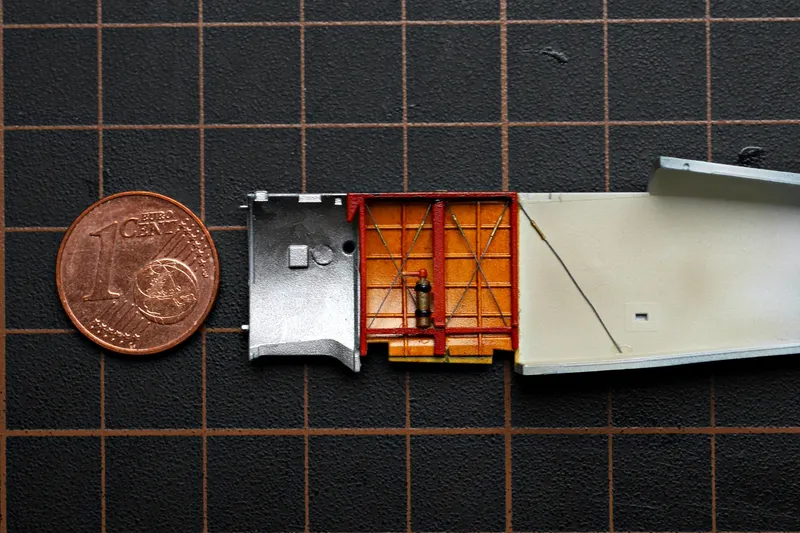
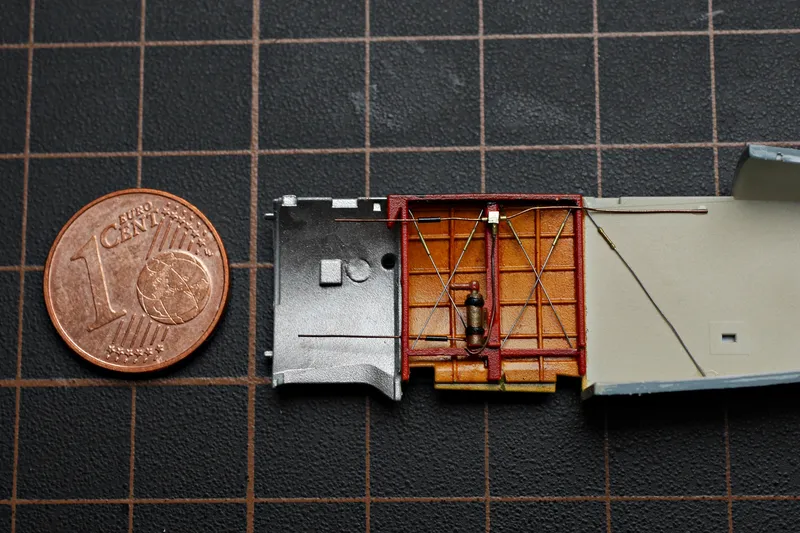
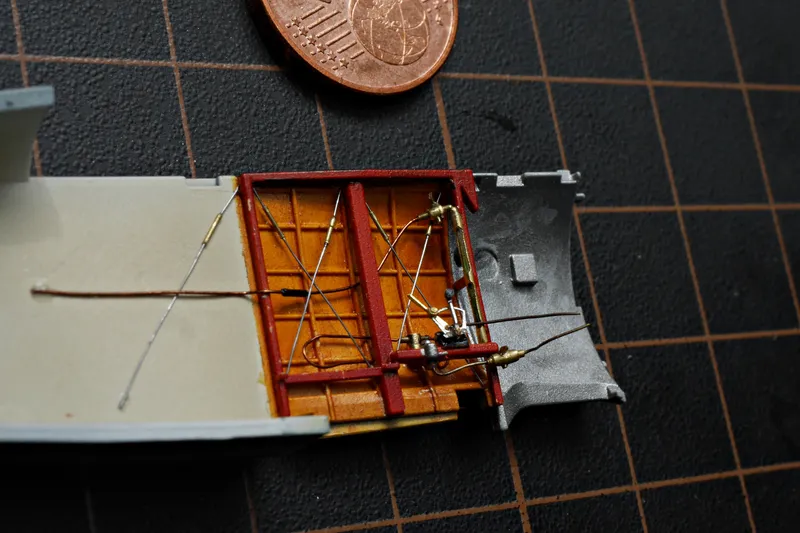
Pic 3 I lost a picture?! After some days drying time I painted the "wooden parts" with Clear Yellow and Clear Orange. The front part was painted Dark Aluminium and got some aluminium blotches. The frame was mounted and rigged (very thin wire; the turnbuckles are 0.3mm brass pipe).
Pic 4 Here I have added the air pressure tubing, which is part of the fuel system. Some scratched brass and annealed copper wire were used. So the right side is prepared.
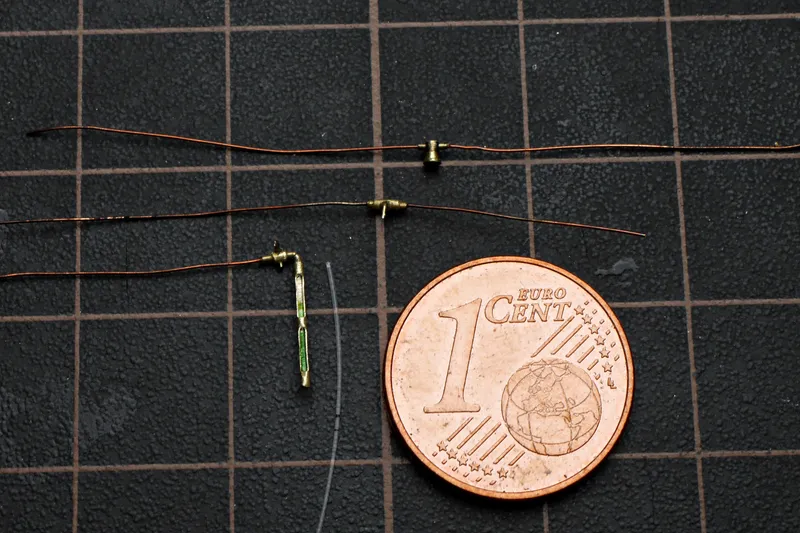
Pic 5 For the other side there is more work to do! Here some scratched brass parts:
- on top a fuel filter, turned on lathe
- in the middle the main shut off valve
- below a fuel gauge. I opened a brass pipe and fit a heat stretched clear sprue in. The "fuel" was painted with Clear Green. The question is: Is the tank half full or half empty?
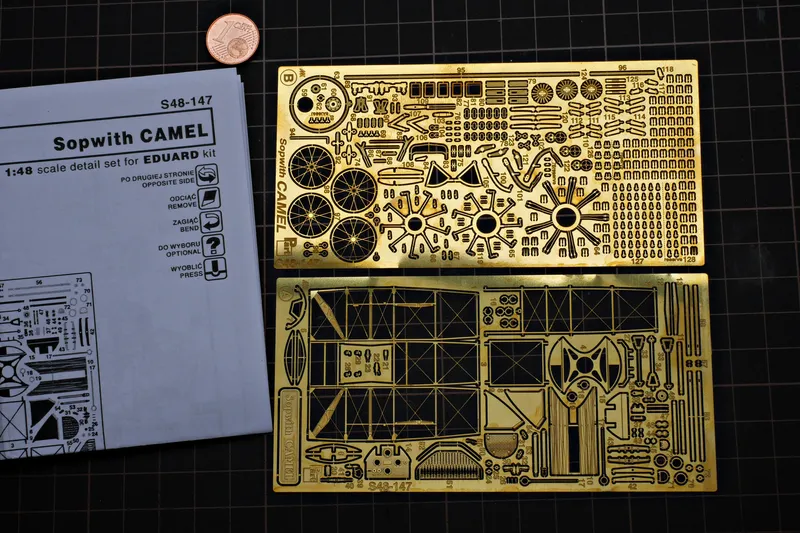
Pic 6 Now it is the first time I use another PE set of the company "PART". Although it's not intended for this kit - it's for the older Camel kit from Eduard - I can still make good use of some of the parts.
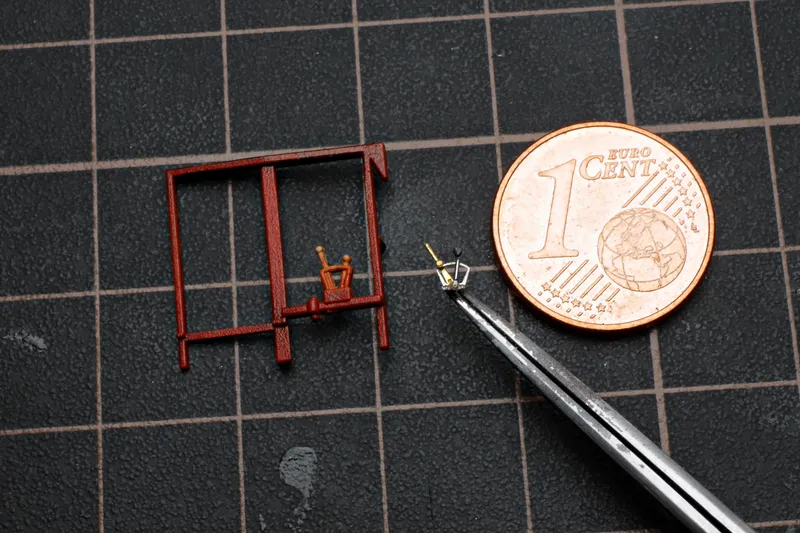
Pic 7 The throttle and mixture control is from this set, I added only the lever in the front. The PE looks better, so I can remove the kit plastic.
Pic 8 Left side is done, with the rigging in same way and all the additions mounted.
Pic 9 The lens position must be adjusted so that the exposed glass of the fuel gauge is visible.
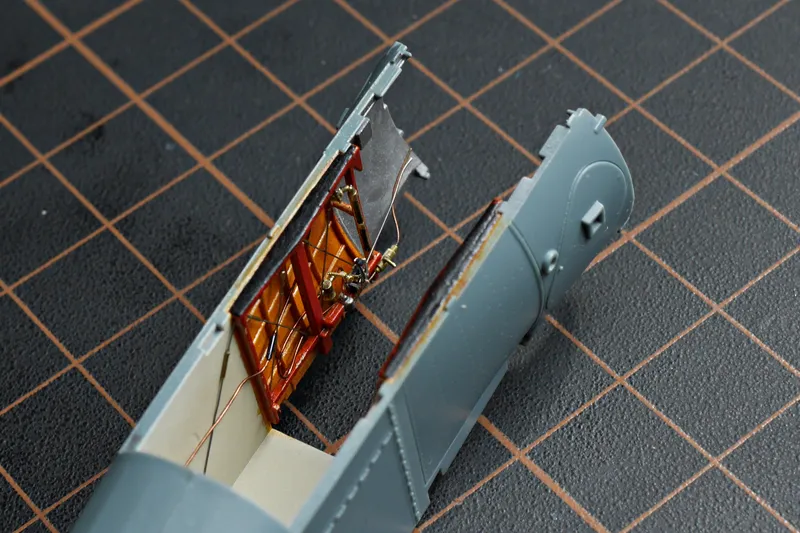
Pic 10 With both halves of the fuselage hold together, you can get an idea of what the viewer will later see of the cockpit.
- S
 STUDIO93545 days ago
The white primer looks very good :p
- MP
 Mattia Pancotti75 days ago
The fuel gauge is INSANE as detail, super WOW!
- B
 Bughunter75 days ago
Replying to Mattia Pancotti
@mattiapancotti Thank you! When I have good reference photos, I immediately start thinking about how I can replicate those details. To build such things is pure fun!
- MPMattia Pancotti74 days ago
Replying to Bughunter
@bughunter I can't Imagine that this aircraft has a lot of photos and details of every detail. I love scratch building too but on my favorite WWII aircrafts details are often missed and unknown!
- BBughunter73 days ago
Replying to Mattia Pancotti
@mattiapancotti There are some survivors in museums. But a better source: there is a big group in New Zealand. Sir Peter Jackson (the film maker) invested a lot. The build new planes of WWI with original drawings. And you can find a lot of quality photos of those planes. In some cases I had also help by other experts from Austria for example.
- AD
 Andre du Plessis91 days ago
Looking good so far!
- B
- DD
 Dutch Dave Model Bench95 days ago
That wood work looks very nice.
- B
- BBughunter97 days ago
Replying to Kyle DeHart
@Kyle DeHart Thank you very much! Your words are highly appreciated! The half full or half empty fuel sight glass matches this update: this was update number 8 and 7 more weekly updates are possible before the finish line arrives.
- BBughunter97 days ago
@Juergen Klinglhuber Thank you! This old biplanes uses only a small windshield and do not cover the cockpit opening. So the details are very easy to see with the naked eye. I hope you can see it at the exhibition in Ried/Austria in October!
- BBughunter97 days ago
@Doug Mulle Oh yeah! When I imagine flying in these open cockpits in the winter at -20°C (or even colder up in the air), with a big fan in front of me (or, in the case of the DH-2, even behind me). That really commands deep respect!