Dannyelyto
@dannyelyto
7
Following
50
Followers
17
Updates
316
Likes
39
Comments
0
Votes
@dannyelyto
7
Following
50
Followers
17
Updates
316
Likes
39
Comments
0
Votes
48 days ago
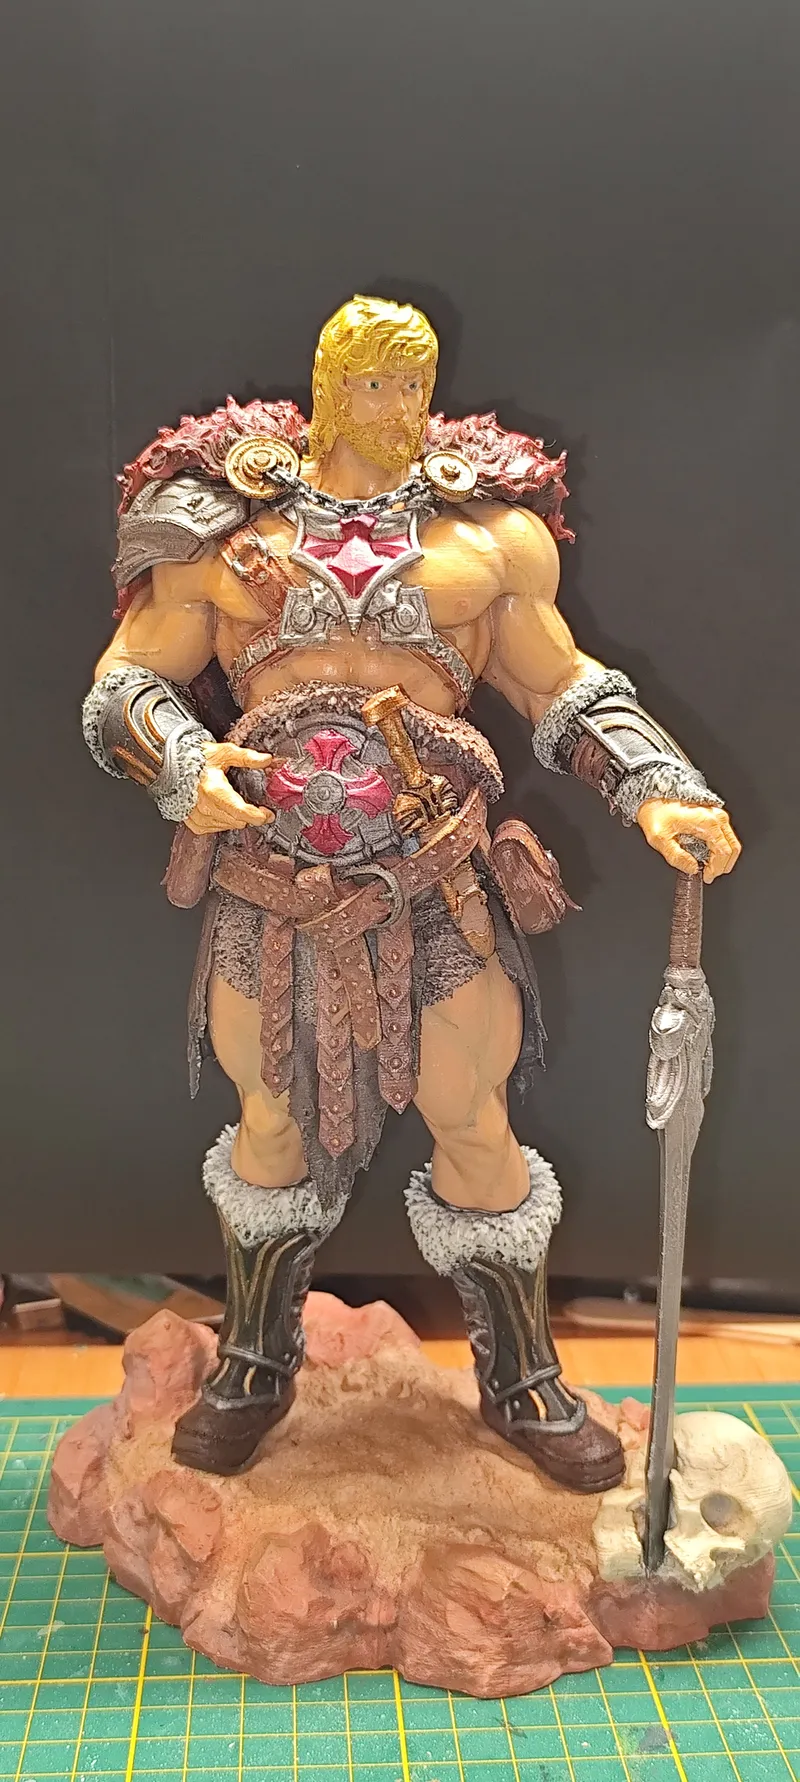
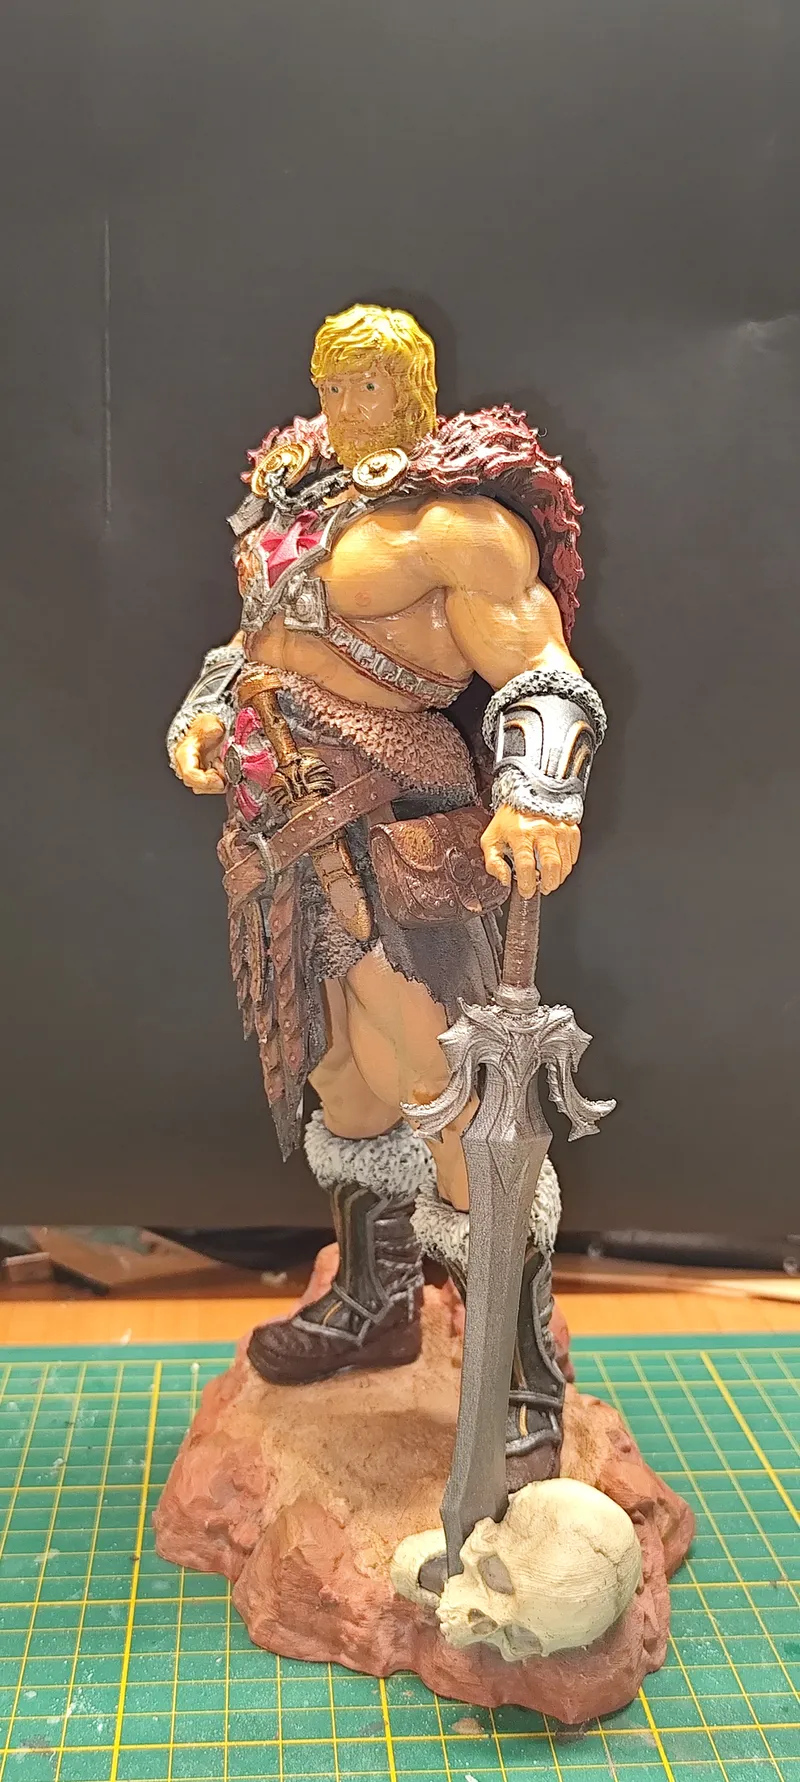
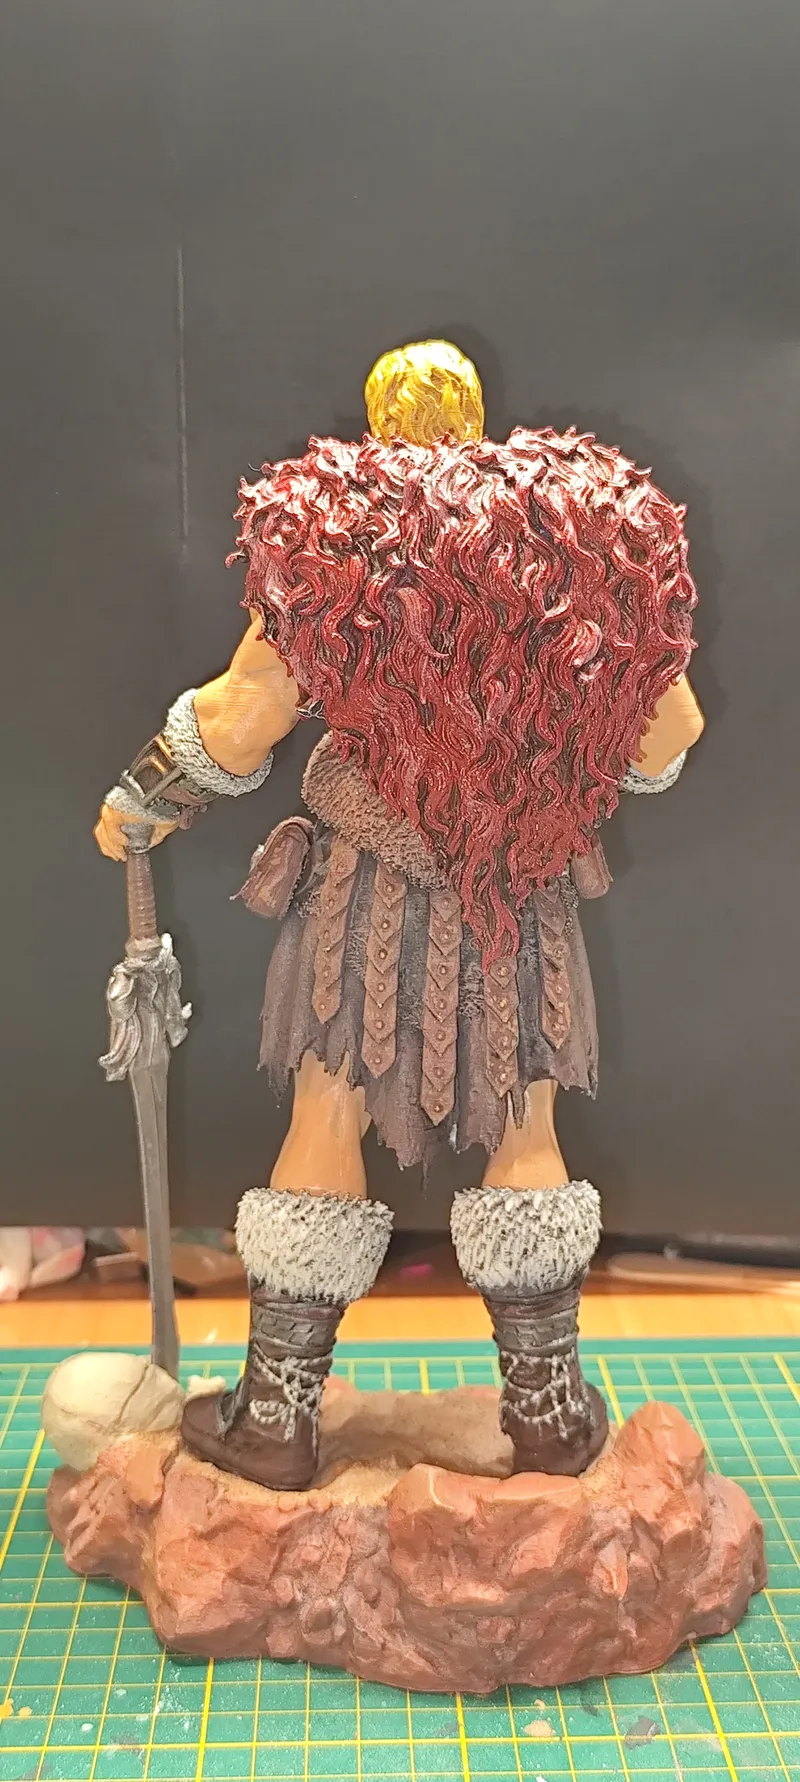
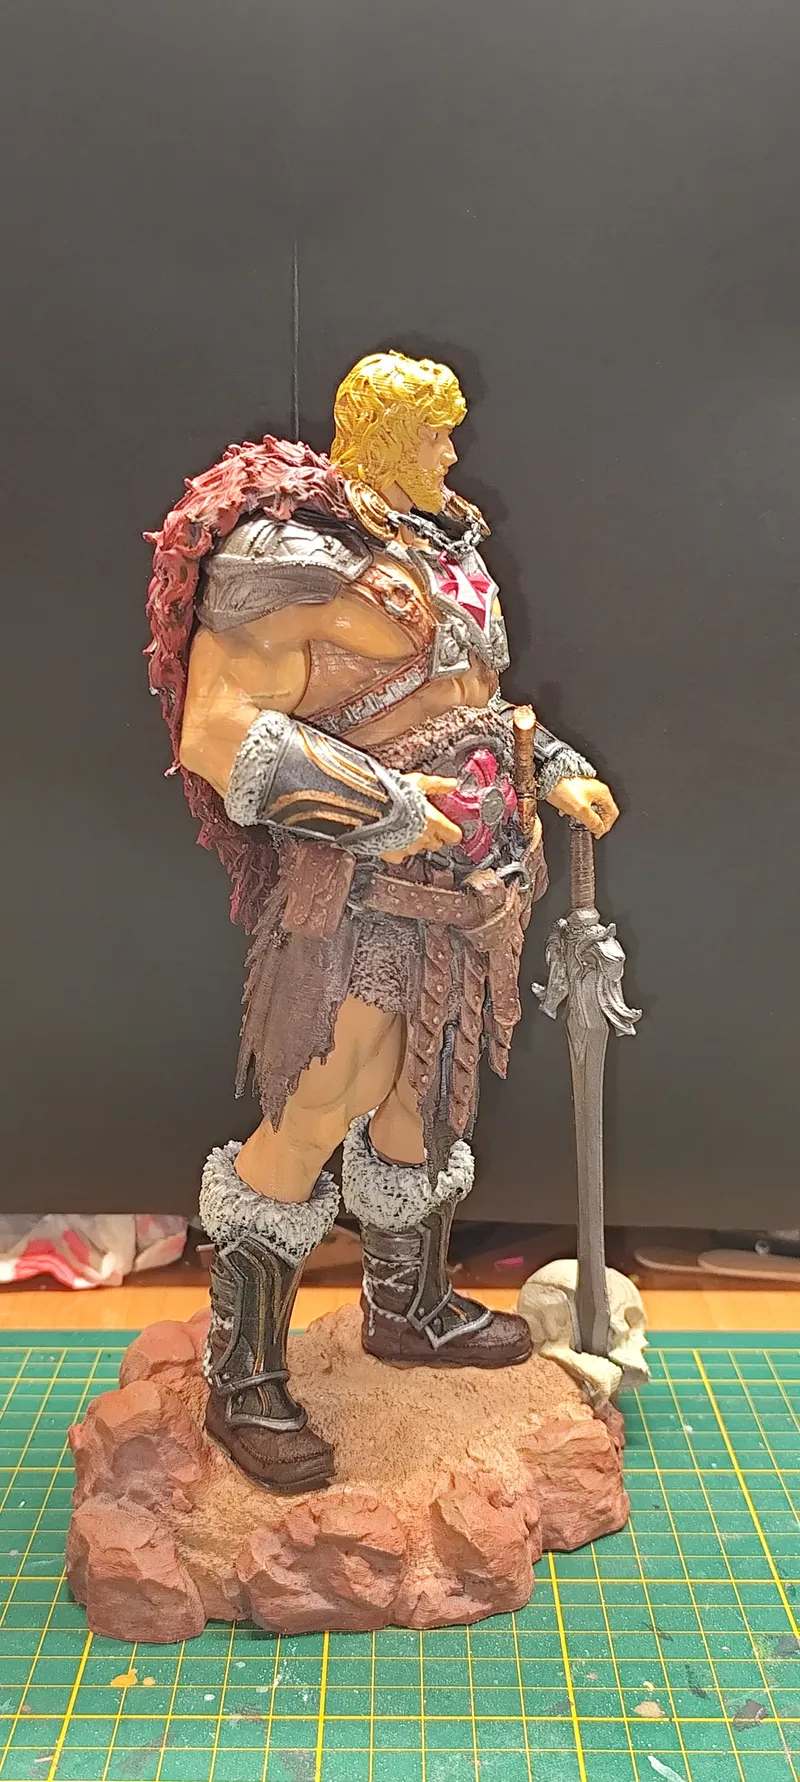
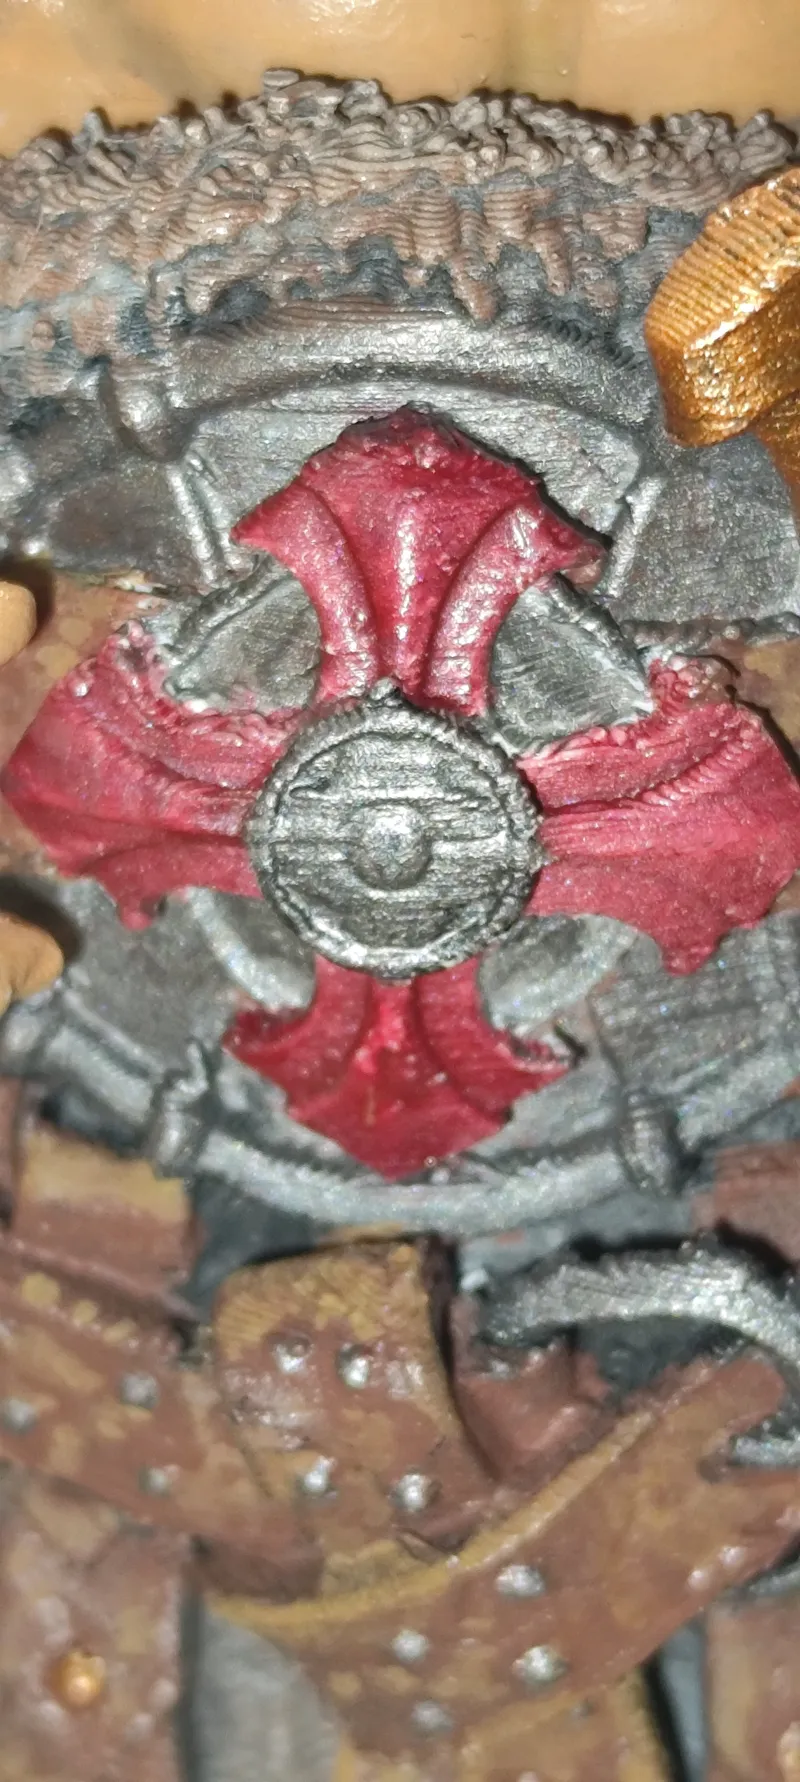
Hello everyone! I’m super excited to present my version of He-Man for this contest. This is a very special piece for me for several reasons. First, because it’s the second figure I’ve painted while trying to reach a semi-professional level, and second, and most importantly, it’s the first time I’ve dared to enter a contest with one of my works.
I’m really happy with the final result. Truth be told, at the beginning of the project I doubted whether I’d be able to pull it off on my own, but thanks to the incredible support, advice, and chats with fellow members of the RAW2REAL community, I managed to finish it. Thank you so much for the push, guys!
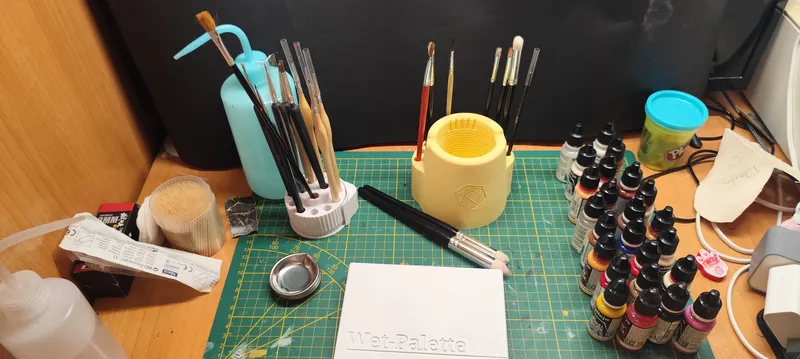
For this project, I combined 3D printing for both the figure and the base (which I made myself) with a painting technique using an arsenal of "budget-friendly" materials. As you can see in the attached image, I used Vallejo paints to bring He-Man to life, but the bulk of my painting gear consists of synthetic brushes bought from AliExpress, Temu, and dollar stores. Proving that with enthusiasm and accessible resources, you can achieve great things!
The whole experience has been amazing and I’ve learned so much in the process. I can’t wait to see the rest of the entries and keep improving.
Best regards to all hobby lovers!

63 days ago
Hey everyone! Bringing you another update on my contest entry. As you can see in the photo, it's really starting to take shape, but there’s still a long way to go. BY THE POWER... and a whole lot of work! 👇
Honestly, the waist and belt area is turning out to be the trickiest part to paint so far. There are so many nooks, buckles, and different textures (leather, metal, fur) that defining everything is taking a lot of patience.
The leather parts still need plenty of love; I’m planning to add weathering, scratches, and wear-and-tear details so this He-Man looks like he’s survived a thousand battles rather than just walking out of the box.
It’s not all a struggle, though! This project is my first real dive into metallic paints, and I have to say I’m super happy with the results! I'm loving how they react.
In fact, to push it a bit further, I decided to thin them with Gloss Medium instead of water or standard thinner. This gave me an extra shine and a slicker finish on the metal areas (like the chest harness and buckles)—perfect for a hero of Eternia.
Still lots left to do (the head is the next big challenge), but I'm enjoying every single brushstroke! What do you think of the progress so far? Any tips for weathering leather? Let me know in the comments!

71 days ago
Hi everyone! Things got a bit hectic on a personal level this week, so I haven't been able to make any progress on the project.
The brushes and workbench had to take a back seat for a few days, but the motivation is still 100% there. As soon as things settle down, I'll be back at it to give it that final push.
Thanks everyone for your understanding and support! I promise to bring you new updates very soon. 🖌️✨

77 days ago
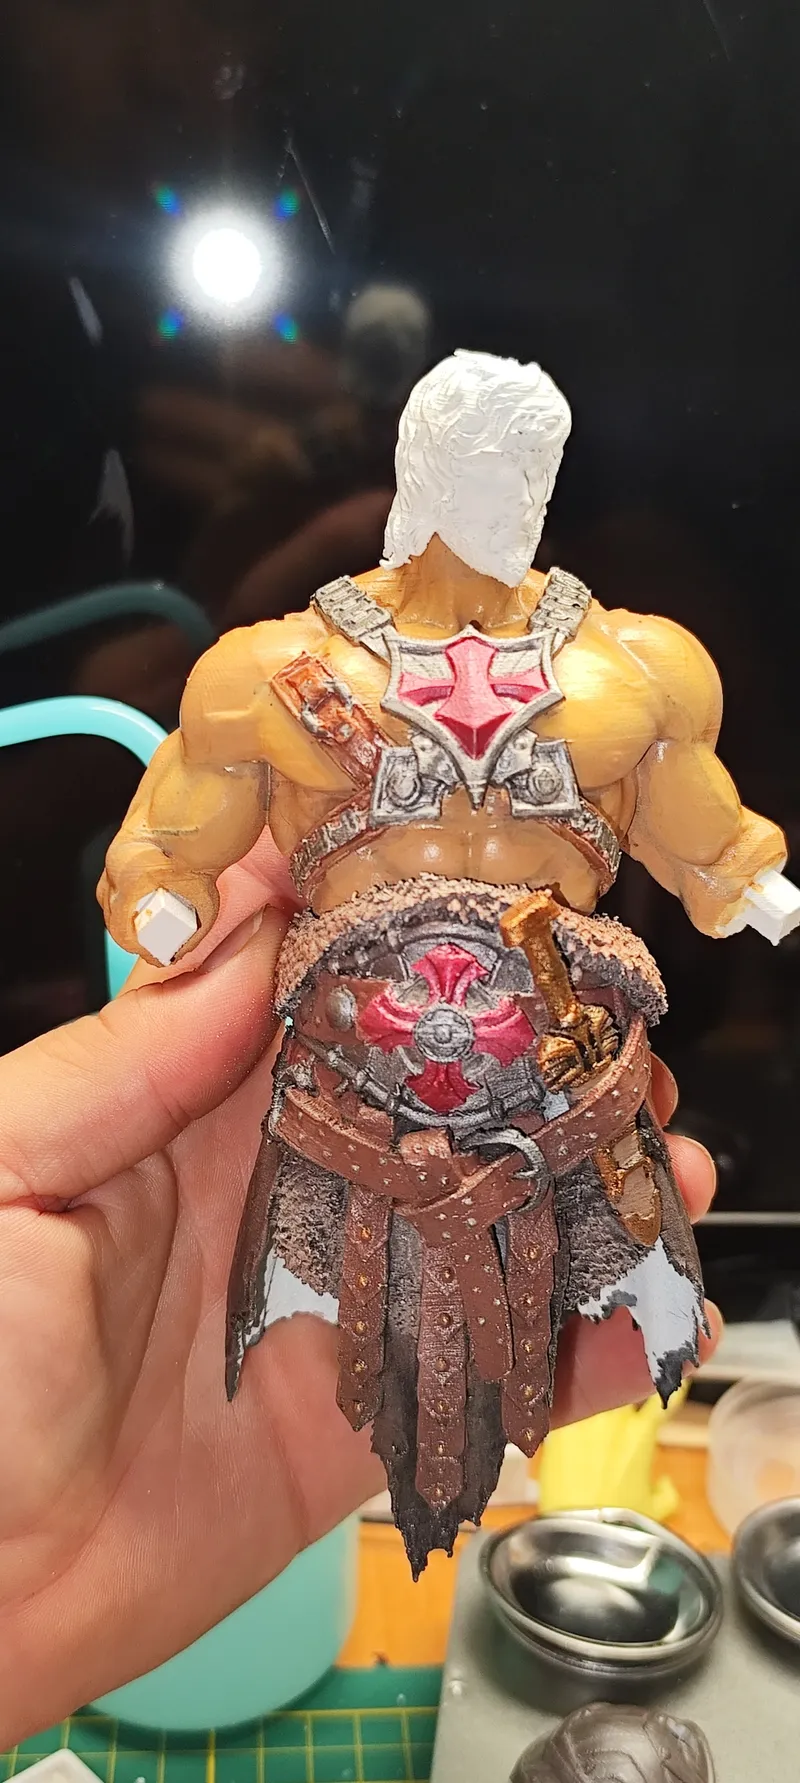
Prince Adam is about to raise his sword! Here is a progress update on my He-Man. I've applied the first skin tones to those legendary muscles, and the harness is ready to shine. The rocky base with the skull already gives off those Snake Mountain or Castle Grayskull outskirts vibes!
🕵️♂️ Behind the scenes: Take a quick look at the belt area... it’s not what it seems! The piece you see attached in the photo is actually a discarded test print.
I used it temporarily as a "stand-in" to check proportions and overall fit while the definitive waist piece (the real deal, full of detail!) was drying after being primed. This allowed me to visualize the complete figure without losing any time! Just part of the modeling process.
Soon you'll see He-Man with his final gear and in full color! What do you think of the pose so far? 👇
84 days ago
Kicking things off in the contest! 🚀 Here’s a progress update on my project after the first painting session.
I focused on laying down the base tones for the skin to start defining the musculature and build up that necessary warm base layer. Even though this is still in the very early stages and the highlights and final glazes are yet to come, I think it's coming along really well so far!
It's all about patience, but the results are starting to show. What do you think of this initial color pass? 👇
91 days ago
✅ 3D Printing Phase: COMPLETE.
After hours of printing and prep work, all the pieces are finally ready. Time to put the printer on pause and break out the brushes! 🖌️
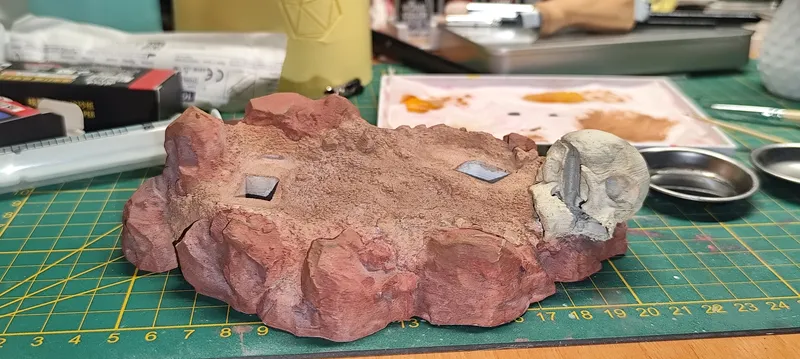
We’ve started working on the base and the skull you see in the picture. Our main goal for this stage has been realism and texture:
💀 The Skull: We didn’t want a clean, fresh bone look. We applied paint layers and weathering techniques to simulate accumulated grime, aging, and that weathered, yellowish look worn down by the elements.
🏜️ The Terrain (Base): The base isn't just a stand; it tells a story. We worked on the erosion of the rocky ground, using reddish and earthy tones to mimic a harsh canyon or desert landscape where the stone has been heavily worn away. You can almost feel the dust!
This is just the ground layer of the diorama, but we can't wait to show you how everything fits together. Really happy with how the textures are coming along.
What do you think of the weathering effect so far? Let me know in the comments! 👇
97 days ago
Hello again, everyone! 👋
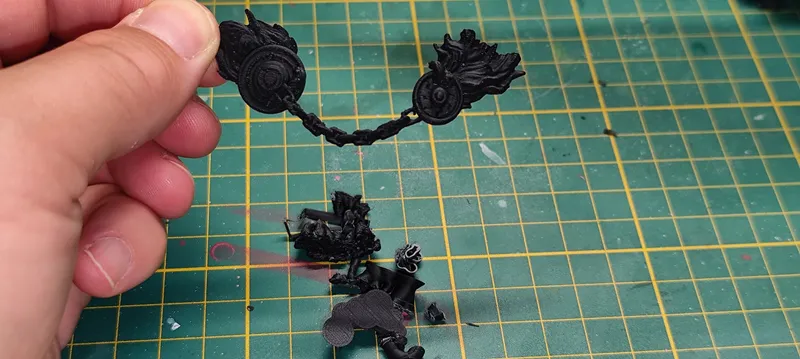
If you’ve been following my previous posts, you know what a headache the cloak on this figure was giving me. That darn combination of the chain and side clasps was almost impossible to get with a good finish if I tried printing the whole piece in a single orientation.
But after countless tests and a few failed attempts, I’ve finally found the ultimate solution! 💡
The Strategy: Divide and Conquer
The only way to get the chain and clasps to come out decent, clean, and sharp (just look at the result in the photo!) was to cut the cloak into two parts before sending it to print.
Why Did This Solution Work?
The Result:
As you can see in the image, the chain links are perfectly defined, and the clasps show all their details without any blobs or warping. Now all that's left is joining the parts, a little sanding on the seam, and off to painting! 🎨✨
Tip of the day: Don't be afraid to slice up your 3D models if a specific area is giving you trouble. Sometimes, "divide and conquer" is the golden rule in FDM printing.
I hope this trick helps you with your next complex projects! Do you usually split tricky parts too, or do you prefer fighting with supports until the bitter end? Let me know in the comments!
105 days ago
Hi everyone in the 3D printing community! 👋 As you know, the Ender 3 V3 SE is an incredibly versatile and capable machine, but today I want to share a project that is truly putting my skills (and my patience) to the test.
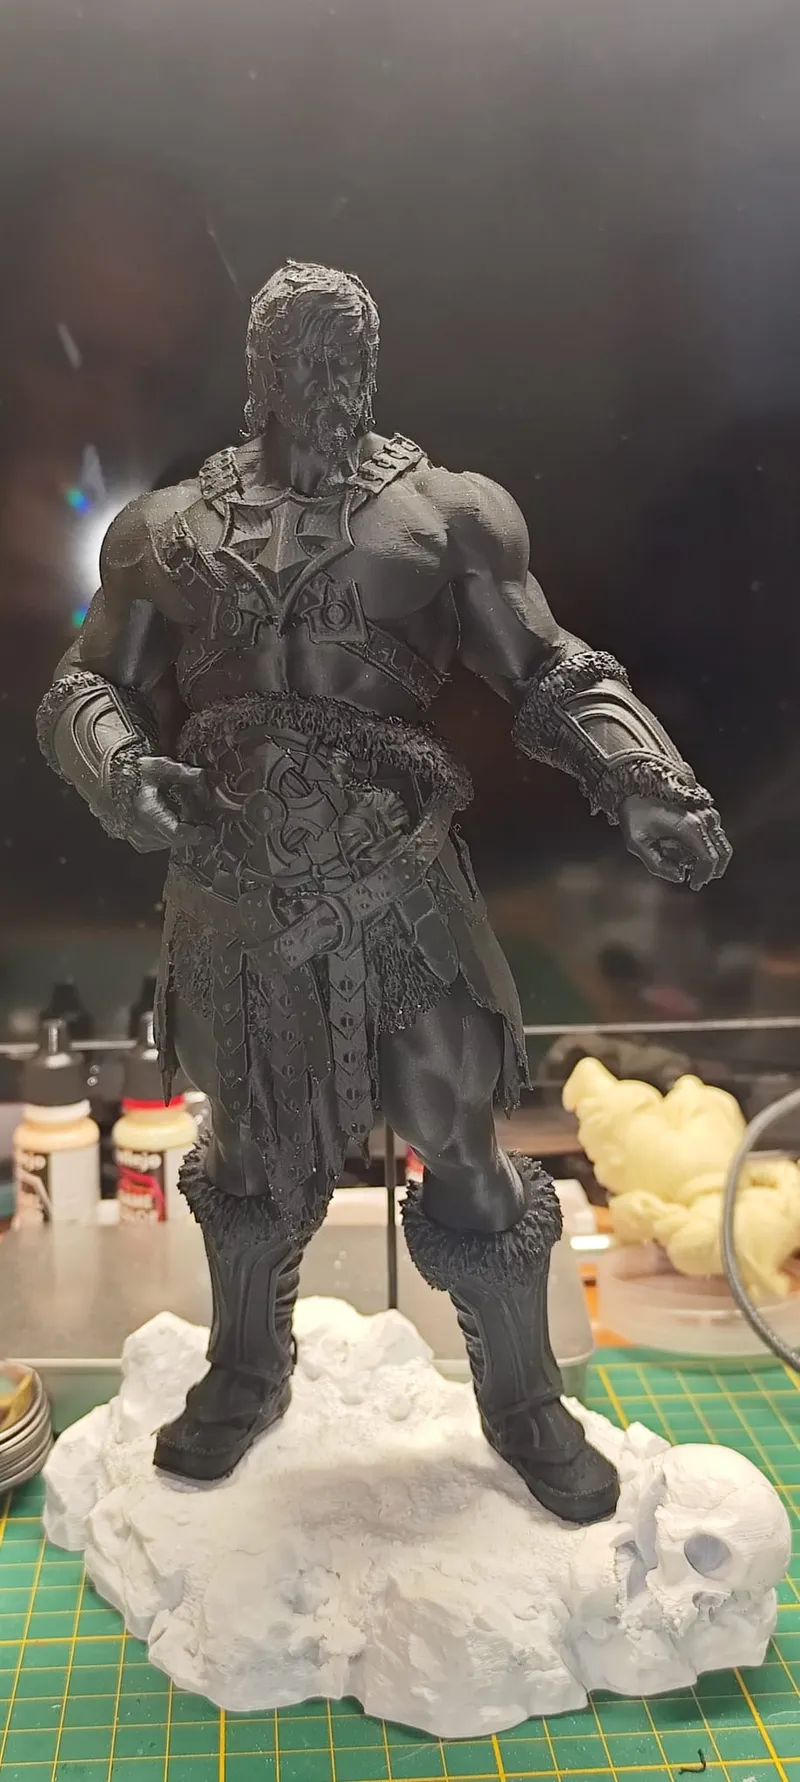
This impressive warrior figure (just look at the attached photo, figura.jpeg!) has been an amazing project to work on, but printing the cloak has been... let's just say, a massive challenge. Despite dialing in settings and following community tips, this specific part is proving to be highly difficult to get right on my setup.
Why Is this Cloak So Difficult to Print?
The complex geometry of the cloak—with its intricate folds, flowing fabric look, and the way it needs to attach to the main body—makes it a nightmare for overhangs. Finding the right balance between clean surface finish, stability on the bed, and easy-to-remove supports without scarring the print has turned this into a real headache.
The Printing Battle: Steps and Setbacks
Lessons Learned So Far:
Conclusion:
The main figure turned out absolutely spectacular, but this cloak is giving my Ender 3 V3 SE a run for its money! It's proving to be a tough battle, but that's exactly what makes this hobby so rewarding.
Wish me luck on the next attempt! If you have any pro-tips for printing complex capes or tricky overhangs on the V3 SE, please let me know in the comments below!
112 days ago
Hi everyone! Today I want to share an example that perfectly illustrates why part orientation is critical to the success of a 3D print.
The Case: A Cloak with Chain and Clasps
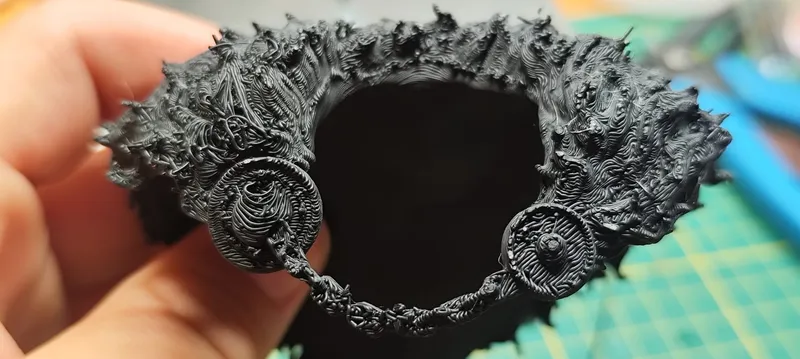
In the attached image, capa.jpeg, you can see a printed piece consisting of a cloak with a chain and side clasps. The orientation of the part during printing was flawed: it was placed so that the chain rested directly on the print bed.
The Consequences:
Why Is Orientation So Important?
Part orientation affects several key aspects of 3D printing:
Lessons Learned:
Conclusion:
Part orientation is a fundamental factor in 3D printing. A small change in how you rotate your model on the bed can mean the difference between a perfect print and a failed, useless piece. Don't underestimate the power of orientation—spend those extra few minutes planning your print layout!
Thanks for reading! If you have any questions or want to share your own experiences with orientation fails, feel free to leave a comment below!